Friday, May 30, 2008
I Got Bit by the Fat Bottom Bug!
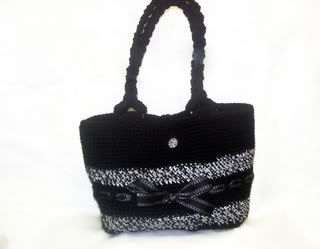
So I finally gave in and made my very own Fat Bottom Bag.... LOVE IT! The pattern is so easy, great for sitting in front of the TV and only half paying attention. Thanks to other Ravelry user's projects I found a great tutorial for lining the bag. The pattern leaves so much room for personal taste and creativity that I don't think I've seen two that looked the same (unless it was planned that way, of course). The pattern was well written and easy to use!
My FBB is made with Paton's Decor wool/acrylic blend in black and lined with a silky polyester flower print fabric from JoAnn's. The handles are bamboo. I made a little tube of the lining fabric to decorate the front and added a button and flap closure. So cute! This one is for my friend Alison, but I have plans to make at least 2 more of these: another for a friend and one for ME! This is definitely one of the projects I'm most proud of.
Wednesday, May 28, 2008
My Marky
I finished my very last auction custom order yesterday! It is Marky the Monkey from Forever T & M Crochet Patterns. I have loved this pattern for a long time, so I was so excited when someone wanted me to make one! Overall the pattern was good. I didn't understand the directions for attaching the muzzle for a long time, but when I did get it figured out it made much more sense. I think explaining it would be difficult no matter who wrote out the directions!
I used white and green at the request of the purchaser (my BIL who is a doctor - I think the colors are related to scrubs/white coat of a doctor, but I didn't ask: just a guess! *edit: nope, he just likes the color green... and monkeys*). I liked it in these colors, but the original dark green/light green was really nice. Its all done in worsted acrylic for machine washability, using a variety of brands, whatever seemed to be the right colors. You gotta love the hoodie - what a cute accessory!
I had a few issues with the pattern, but I think I realized something about it when I was done: I don't like using other people's patterns! I have "issues" with every pattern I use, it seems - maybe I'm the issue! I think I will keep my negative comments to myself from now on unless its a glaringly bad mistake that the author is not willing to correct.
This is what I hope will be done with the monkey when it reaches its intended little one... an ami just isn't worth anything if its not loved on!
Wow, clean toes! That's a rarity on my little one! Hehe, this is totally in here because I think its such a cute picture :)
Blog Review - Lesalicious Style and Life
Today we're taking a look at Lesa's blog, Lesalicious Style and Life. This blog is a mix of sewing and crocheting. Lesa has a fresh, open writing style that draws you straight into her life and her creative genius!
Lesa uses her years of sewing experience to guide her crochet work, which is mostly improvised. She offers great tutorials for crocheting without a pattern, specific crochet techniques (e.g. working off a chart), and sewing (e.g. a reversible purse). Lesa makes lots of items for her two gorgeous daughters both with sewing and crochet, even some recycling of old clothes into new ones. Ideas abound on her site for those of us with little ones!
Here is Lesa's email survey responses:
What is your name?
Lesa is what everyone calls me but, Ellisa is my name.
How long have you been crocheting?
About 2 years and a half now.
What's the project you're most proud of?
I have a lot but, I am only going to pick a couple that I like the most that has a little of a reason behind to why I picked them
What's your favorite thing about crochet?
To me it helps relieve stress. I took on crocheting because I liked it a lot but, didn't know anyone to teach me so I tought myself and every since it has been a stress relief for me that now became a great hobby that I would like to pass down to my kids one day.
What type of projects do you enjoy working on the most?
I notice I tend to crochet purses a lot more since they are fast to whip up so I will have to say purses. What woman don't like purses?
What's the project you're most proud of?
I have a lot but, I am only going to pick a couple that I like the most that has a little of a reason behind to why I picked them
What's your favorite design you've ever created?
I do design but, I yet to write my own pattern so do that counts. I am more of a winging person. I am more of a look at something and go for it. So I will have to say all my own designs are my favorite I don't really have just one because most of my crocheting projects are mainly my own designs.
How do you go about designing?
How do I go about hmmmmmm, I mainly just think of something I like to wear or I use my daughters as a way to help me out. They love looking at books, and magazines so I tend to get ideas like that also from other people blogs also helps me a lot with my own designing it gives me a little idea of what I like to make in the future of give a try at without a pattern.
What else are you interested in?
Well I started off with sewing when I was 13 years old. I started with making little baby doll clothes then I started with making small purses for me and my friends and worked my way up to making my own summer clothes and every since I have been sewing. Have had about 10 different sewing machines since then lol. So sewing and crocheting are my main hobbies. I do read a lot whenever I am not doing either sewing or crocheting. I am a horror movie fan so you can find me watching horror movies and crocheting up a storm on the weekends.:)
Is there anything else you want people to know about you?
Well I am a mom to my 2 wonderful gals. Nesa that is 5 going on 30 lol Nellie that is 3 going on 25 lol. I am 27 wow not in my early 20's no more lol. Live in Milwaukee, WI. I am on my way to try to lose weight and be health for myself. I am a SAHM due to my daughter Nesa being born with a liver disease it's hard for me to work right now but, as a SAHM I now use my hobby to make a little extra money from time to time. Either selling my things at a boutique or doing custom made items. Other words that's me Lesa:)
Oh by the way I am also the host of 2 other blogs. Crochet Chicks where us ladies that love to crochet and show off our work to other crochets. Also Swap Swap Gals for us ladies that either crochet, knit, or sew to come together and swap gifts ever month with other lovely ladies that love to crochet, knit or sew.:)
Thanks for participating, Lesa!
Tuesday, May 27, 2008
I'm Sensing a Theme...
It seems like I've been making a lot of cowboy-related items lately. I realize its my fault; it all started with the super cute baby cowboy hat that I just had to make, followed shortly by the baby cowboy booties to match. But the latest two are not my fault! These were custom orders from the auction.
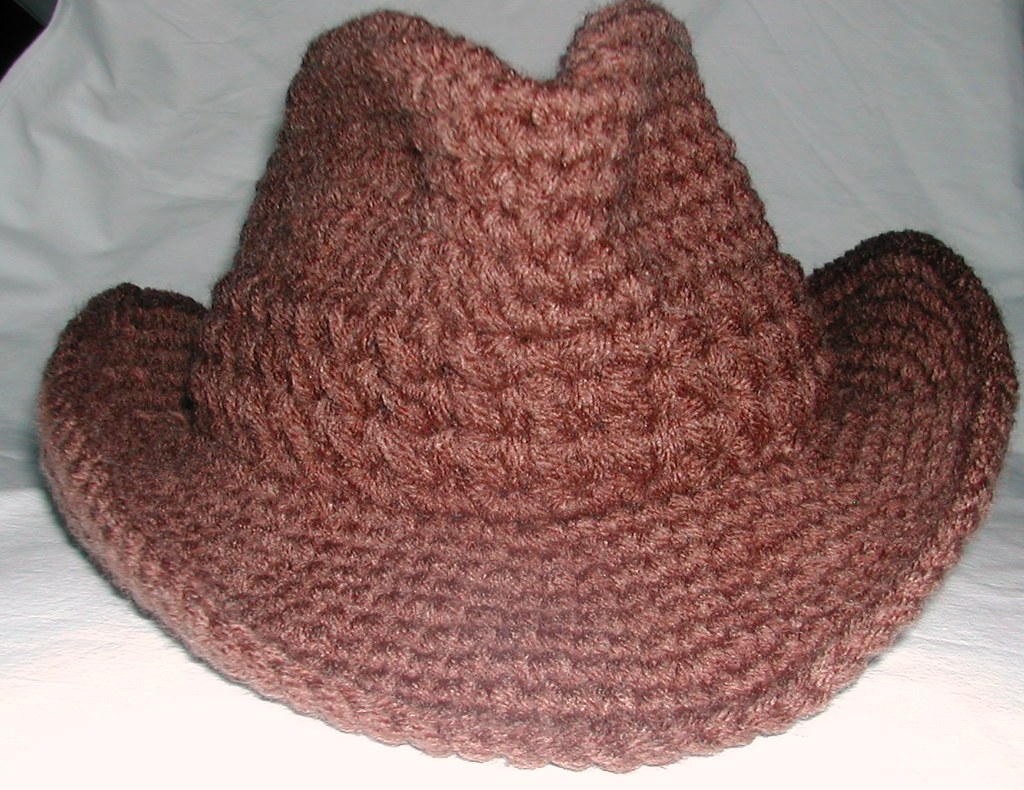
The first is a hat using the Yeehaw Lady pattern from SnB Crochet, but made in a manly brown acryllic instead of red cotton at the request of the purchaser. I was not thrilled with the pattern, and had to adjust it several times before I got a look I was satisfied with. Even after taking a gauge and having to go down several hook sizes, the thing was still a little large. I had to take out one row of the "hat band", and the hat still seemed kind of tall. If I make this pattern again I will be making some major adjustments. I did like the fact that the pattern calls for floral wire to be crocheted into the brim of the hat. It definitely helps the look of the hat and keeps the brim nicely shaped. I used 10 gauge black aluminum floral wire singled instead of thinnner wire doubled like the pattern calls for. It is completely hidden behind the doubled strand of yarn, and hopefully will be weather proof since its coated aluminum. I left off the reverse hdc on the brim as I felt it made the hat even bulkier than it already is. I mean this bad boy has like 9+ oz of worsted weight acryllic in it... it needed no extra bulk!
These photos are admittedly bad. Last night I realized that I was going to have my husband deliver the hat this morning and I hadn't taken any pictures of it! So the photos were taken in the waining daylight, which evidently wasn't good enough for photographing the dark color of the hat. I'll try to update with a photo or two of the recipient sporting his new style when I see him next!
The next item is "Clover the Cow". A friend chose this custom order as a baby gift for her soon to be nephew. His dad used to raise cows - you get the idea. I gave my friend a few cow patterns to look at and she chose two: one each if the baby was a girl or a boy. When they found out the baby was going to be a boy I was getting ready to buy the boyish pattern, but then I thought... surely I can make a cow without a pattern. So I started in and got done with the head and limbs very quickly. As you probably know, the face/head is the most difficult and defining part of an ami, and it took me quite a while to complete. I drew some inspiration from other cow patterns out there and looking at the stuffed animals my kids have collected over the years. It may not be my best work ever, but it is at least as good as the pattern i was willing to pay for, and it was a good challenge!
Sunday, May 18, 2008
Copy Cat Hat
My newest project was a hat made to copycat the Janie and Jack Hat that a friend ordered as a "Custom Crochet" auction item. I had no info to go on other than the picture and the closeup was too blurry to be able to decipher the stitch pattern. I could tell it was a fairly fine yarn, but as I detest thread crochet I decided to go with a slightly heavier yarn. I ended up purchasing 3 skeins of a DK weight, mercerized cotton yarn Elann Sonata in the appropriate colors (Rosetta, Pink Pearl and Light Sage to be exact). This was my first internet yarn purchase and I was very pleased. The yarn arrived VERY quickly and looked even better in person! I really loved this yarn. Its got a little sheen to it, its very firm, but with a loose crochet its very soft and stretchy. It holds its shape very nicely - just what I was looking for in a yarn! Plus it was cheap; what more could I ask for?!
I ended up working the hat in brick stitch using a size H hook (I think). It was a little challenging figuring out how to do the brick stitch in the round, but I came up with something workable by turning at the start of every round and sticking in a chain to get to the next starting spot. Increases were also challenging, and I'm not really sure I can remember exactly how I did them - I know that I was working stitches between other stitches - it worked itself out! The flower appliqué was based on this pattern, but modified to make an eight petal flower like the original hat.
The hat was made for the 24 mo+ range, and was able to fit my almost 3 year old's big head, so I'm not concerned about it being too small for the recipient!
Friday, May 16, 2008
Short Sleeved Bolero
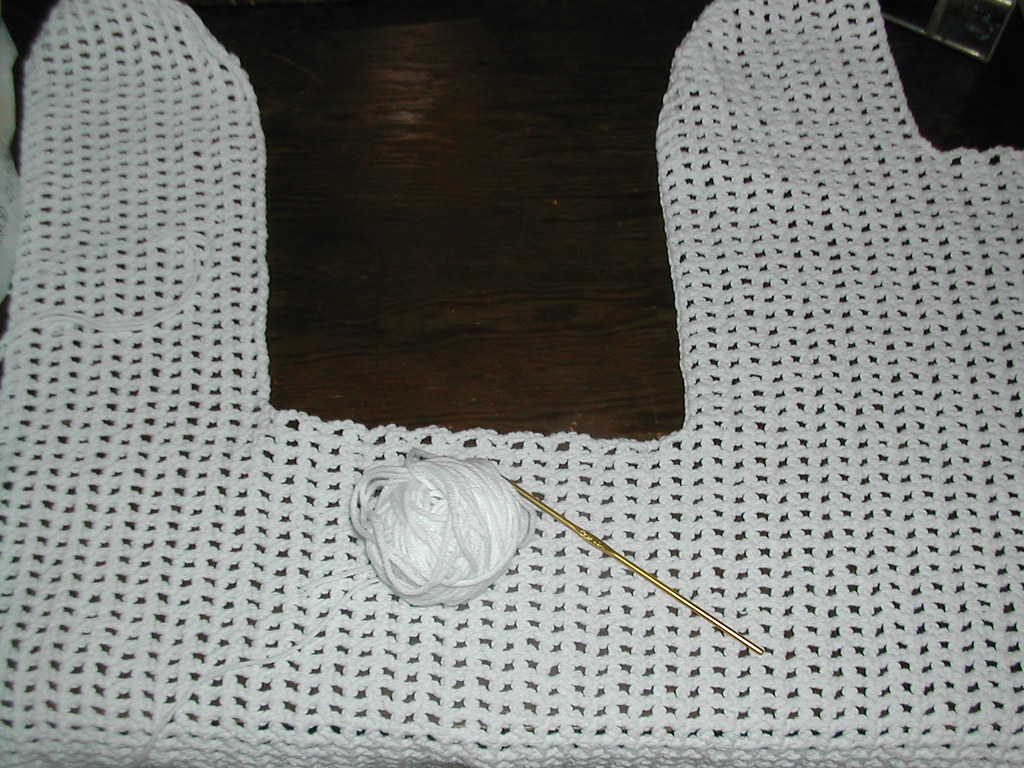
My Mother's Day gift to my mom this year was her choice of handmade items. I know its a lame way to get out of having to pick something myself, but my mom is hard to buy for! We talked a bit and she decided to go with a bolero style jacket. I emailed her a link to several that looked good to me and she picked the Short Sleeve Bolero by Lisa Gentry of Hook and Needle Designs.
The pattern was written as a side-to-side, starting from the left sleeve and working toward the right. This was the first time I had done this type of construction and really enjoyed only having 2 seams to sew when I was done! Its a good thing I did a gauge swatch because I had to go down two hook sizes to get the right gauge! I'm sure its mainly because I'm a very loose crocheter. The pattern was good, the fit was exact, but I made a few adjustments as the right and left side weren't exact mirror images. Maybe its the math-lover in me, but that just didn't seem right.... things must be symmetrical! So I "fixed" it so to speak. I also added my own little adjustments and seamed using a double crochet/space technique so the seam is virtually invisible and it adds a little breathing room. I really liked the edging on the piece... simple shells that really made the whole thing look elegant. I did, however, opt to leave off the gold thread that was supposed to go on the edging as I felt it was kind of gaudy (at least for the intended wearer!).
I couldn't find the yarn that was suggested in any of my local stores and I didn't want to wait for mail delivery or pay extra for rush shipping so I substituted Lion Brand Cotton Ease (cotton/acrylic mix). I really liked the feel of it, and hopefully it will make a long-lasting piece. It took me 3 skeins of the Cotton Ease to make a size L.
We took a weekend trip to Kings Island amusement park the day after I bought the yarn and I spent several hours each way working the pattern. That plus a few hours the next two days finished it up! Overall a quick and satisfying project :) I couldn't help but include this super cute pic of my kiddos enjoying our little getaway!
Monday, May 12, 2008
Knitting... Like, For Real!
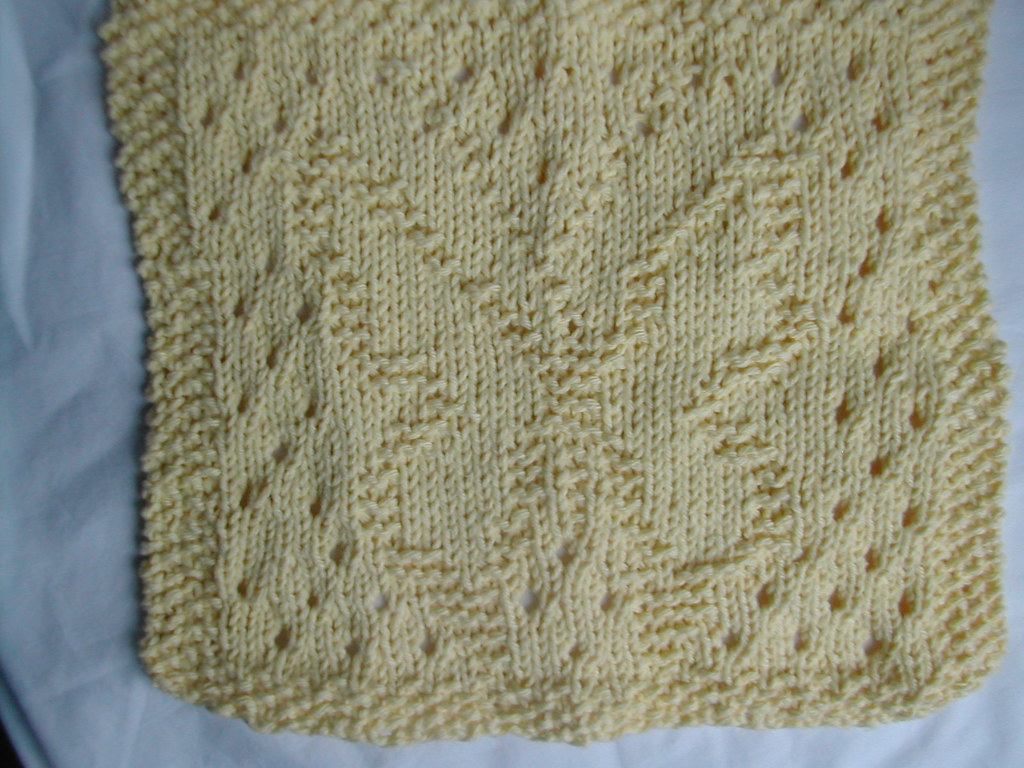
So I am an admittedly not great knitter. I can do an ok stockinette stitch or ribbing and sometimes some cables, but add any "tricks" and I'm usually lost. I was getting tired of crocheting (yes, it does happen every once in a blue moon) but still wanted that relaxation of yarn running through my fingers. So I picked up my needles and a pattern for a cute butterfly wash cloth and started at it. After frogging the first attempt due to several glaring mistakes and it being WAY too loose I started over and got an approximation of what its supposed to look like. Not perfect, but good enough to add to another baby gift. This one for a girl.
I was having so much fun and wanted to do some cables, so I just started stitching and came up with this lovely little cabled washcloth for the set as well.
Cowboy Gift Set
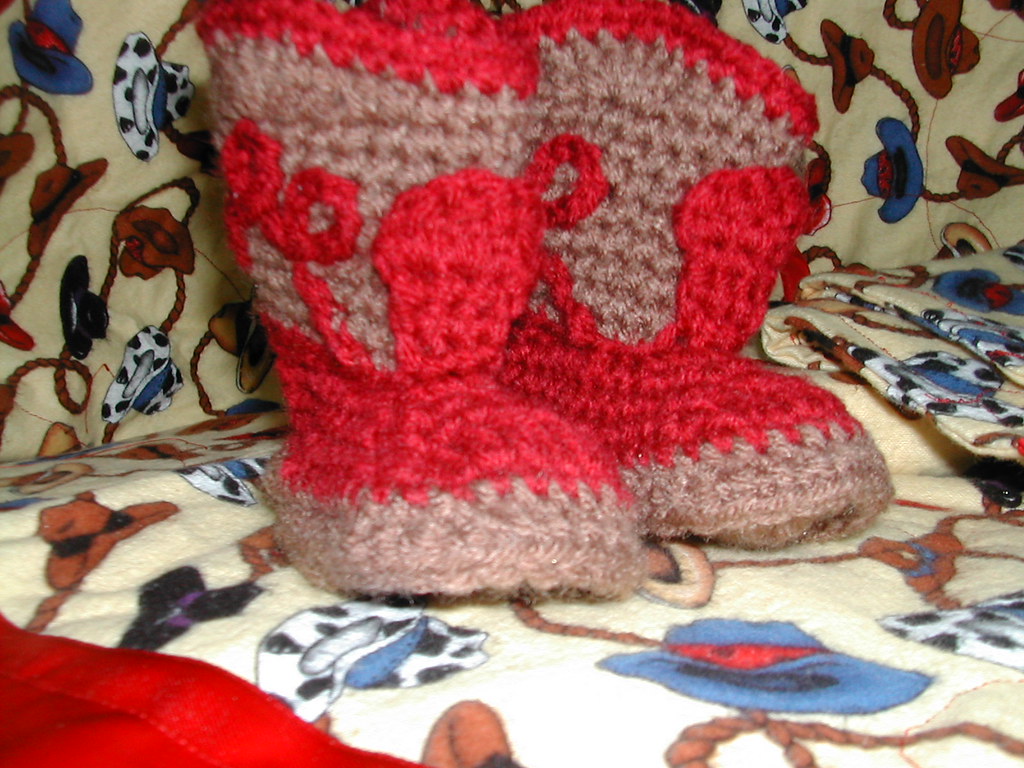
I finished up the cowboy booties and matching burp cloths and blanket to go with the cowboy hat I made, and sent them off to my friend in Portland. I had a ton of fun with this set, but I'm pretty much cowboy'd out after making a second hat for the auction! I found the booties pattern a little difficult, but with some interpretation was able to make it work. I'm still not sure I did it right! This little project helped me improve my sewing skills... I did a satin edge on the blanket plus some hem facing to make the burp cloths look nice. I'm sure I made some major errors, but its not here anymore and I can't remember!
Back to Blogland
I'm back! Custom orders from the auction still are keeping me busy, but I am finally able to blog again! I wasn't idle on my crocheting during the weeks before the auction, and I plan to take some time to post stuff here as I get around to it! I threw up a lot of projects on Ravelry, but not much info about what I did. So... on to the updates!
Thursday, May 8, 2008
The Auction is Closed!
Thanks to all who participated, the auction was a wonderful success!!! If you won a bid I will be emailing you within 24 hrs to confirm. The bidding is now closed. Please note, however, if you are still interested in supporting Brian, there is no time frame for that! Donations can be made directly to his staff account :) There were also a few items that were not bid on. If you're interested you can go check them out. I'll still ship them to you if you want to buy them straight-up with all proceeds going to the ministry as well.
Again, thank you to all who donated, spread the word, bid, and/or won! Because of your generous spirit, over $500 was raised to support the great work of the Gospel in Rome!
Thursday, May 1, 2008
The Auction is Live!
Ok, yes, its another post about the auction. But this is finally the real deal! The auction started today and will end May 7 (Wed) at 10 pm Indiana time. We had some really unique an interesting donations, so be sure to stop by!
Subscribe to:
Posts (Atom)