Meet Alicia. The purchases you made throughout 2010 made it possible for Knits and Knots to 100% fund Alicia's $175 microloan through World Vision Micro. Thank you for supporting Knits and Knots this year. Merry Christmas and may you find the joy of the Newborn King this holiday season!!!
Click here to learn more about Alicia and her microloan :)
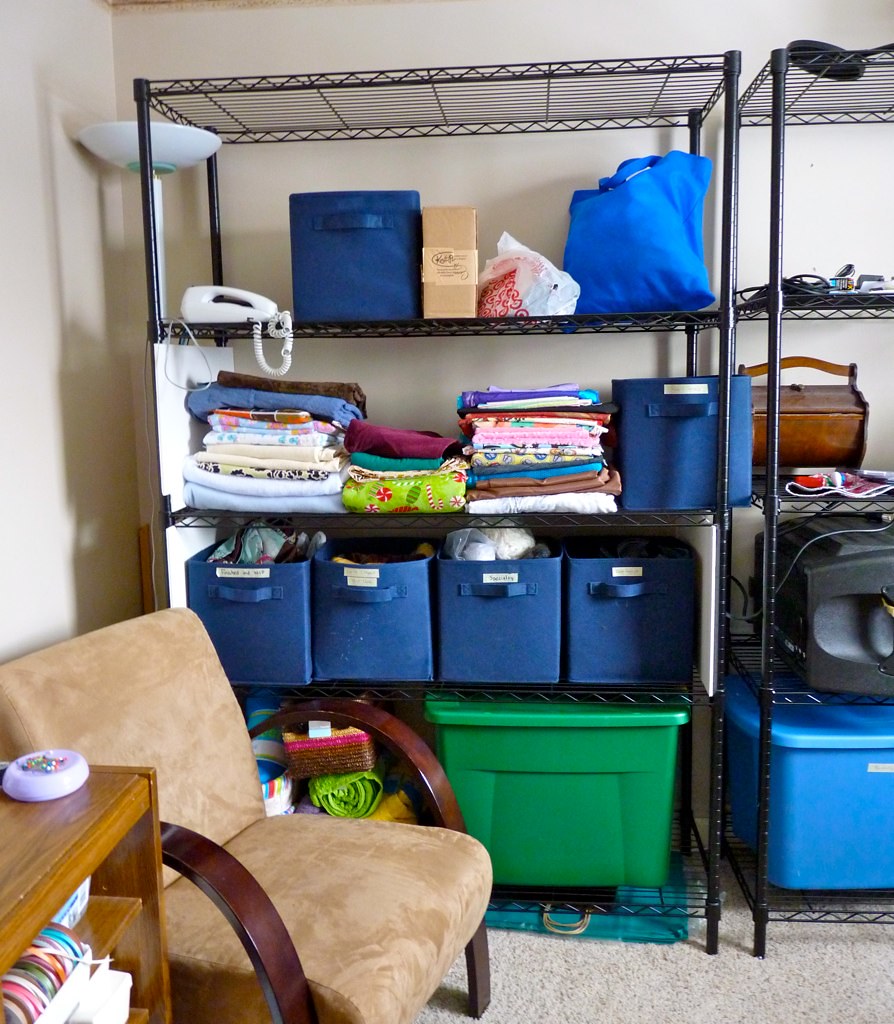
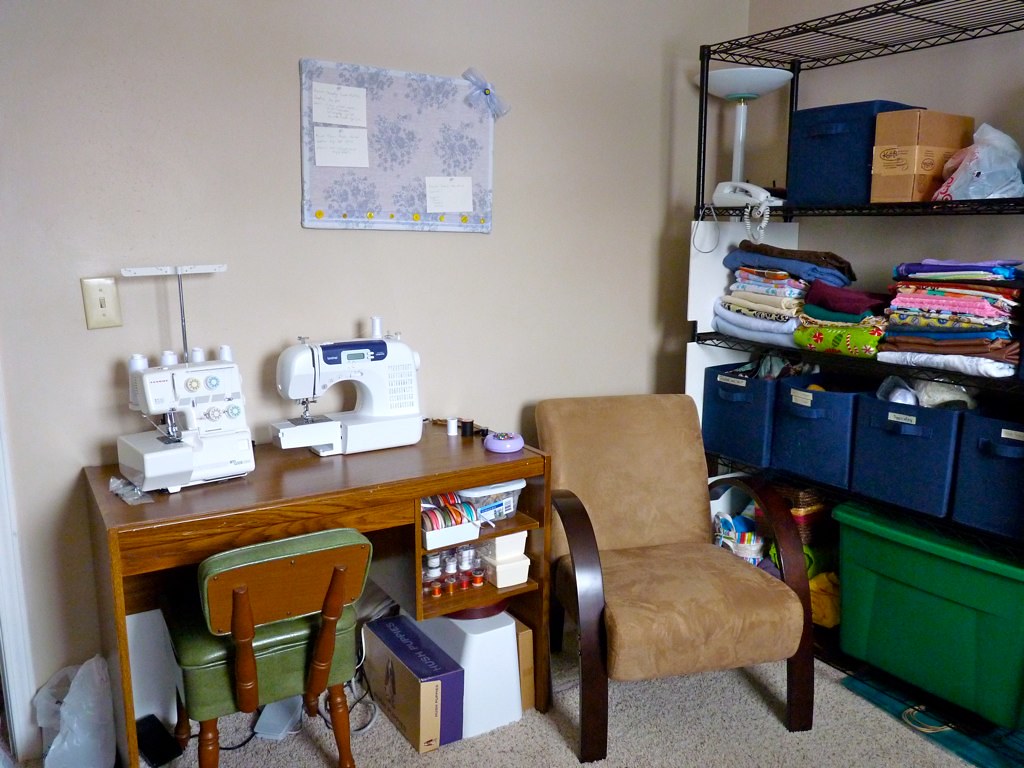
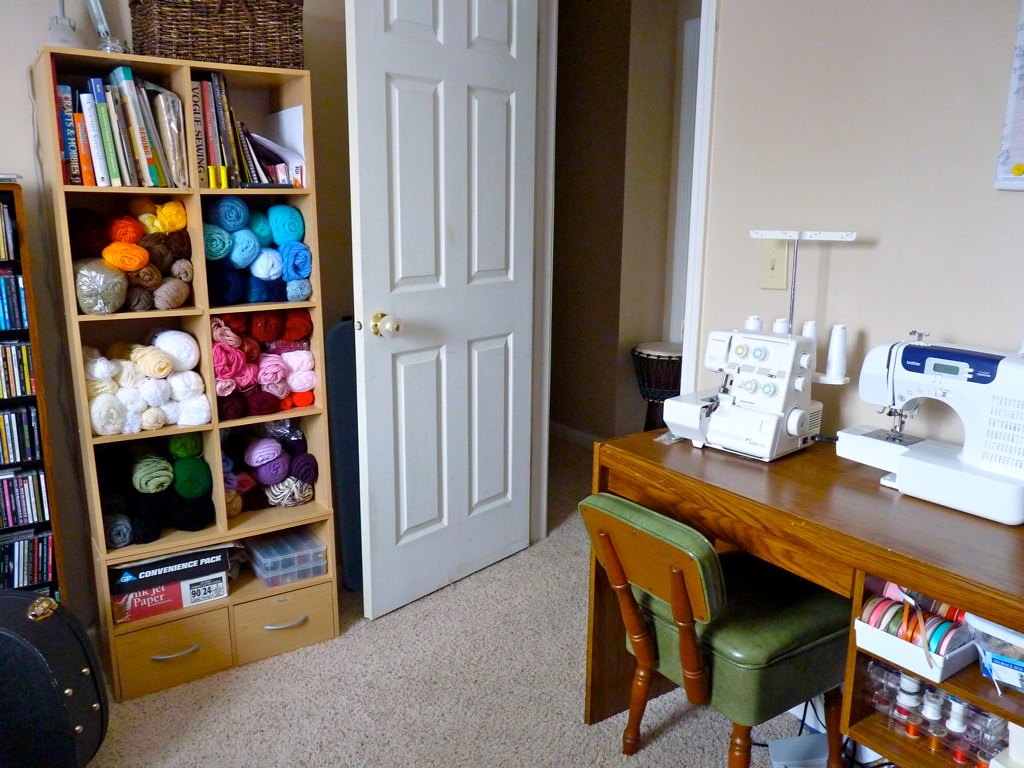
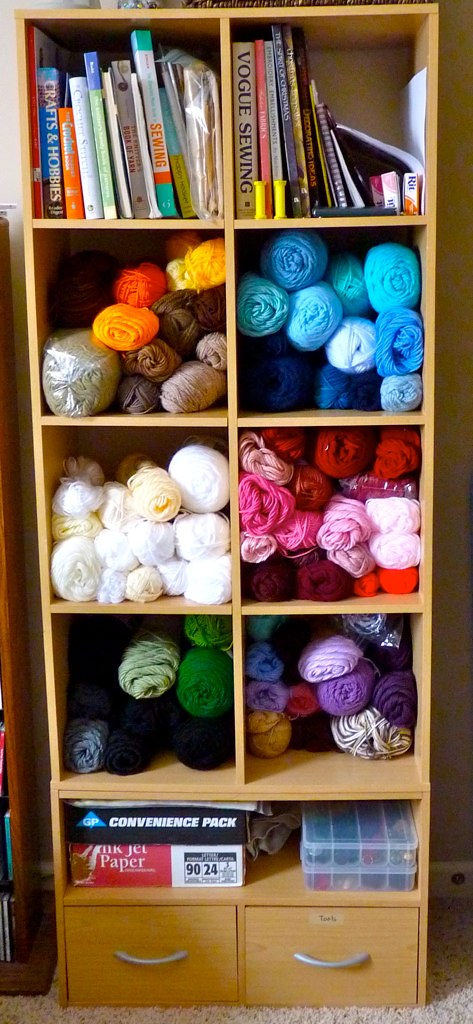
My husband gave me a wonderful early Christmas gift this year - the gift of organization. Matt and I created space in our house for our grown-up hobbies about a year ago. As Knits and Knots has grown as a business, or original organizational scheme for this room descended into utter chaos! I couldn't possibly fit all of the yarn I was accumulating from various projects into the shelves I had available, and fabric was piling up on top of the bins used for storage. I rarely knew what I had and couldn't find things I really needed. It would literally take me about 20 minutes to gather materials I needed simply because I had to unstack all the bins, search through to find the item I wanted, restack the bins, and pray nothing came toppling down on me! My husband was having some similar difficulty as it would take him as long to set up his recording equipment as it would to record a song, only to have to tear it all down again in order for the room to be useful for other activities. After talking it through with Matt he suggested we purchase some industrial strength shelves and line one of the walls. I bought the shelves about a month ago, and promptly put them together. Fast forward 3 weeks and 2 rounds of a stomach virus and I finally found the time to organize yesterday. I am SO HAPPY with it. I can see what fabrics I have available; I can walk through the room without tripping over bags of material; I know whether or not I have that one specific color of yarn I need for that last-minute project. It is fabulous! I have seen other crafty bloggers talk about their "studio" and I never thought I would have one of my own. However, with this step I feel like Knits and Knots has taken a huge leap ahead and I could claim this room as my very own studio. I don't mind sharing the space and letting it be my husband's recording studio as well - now he needs a chance to organize that side of the room :)
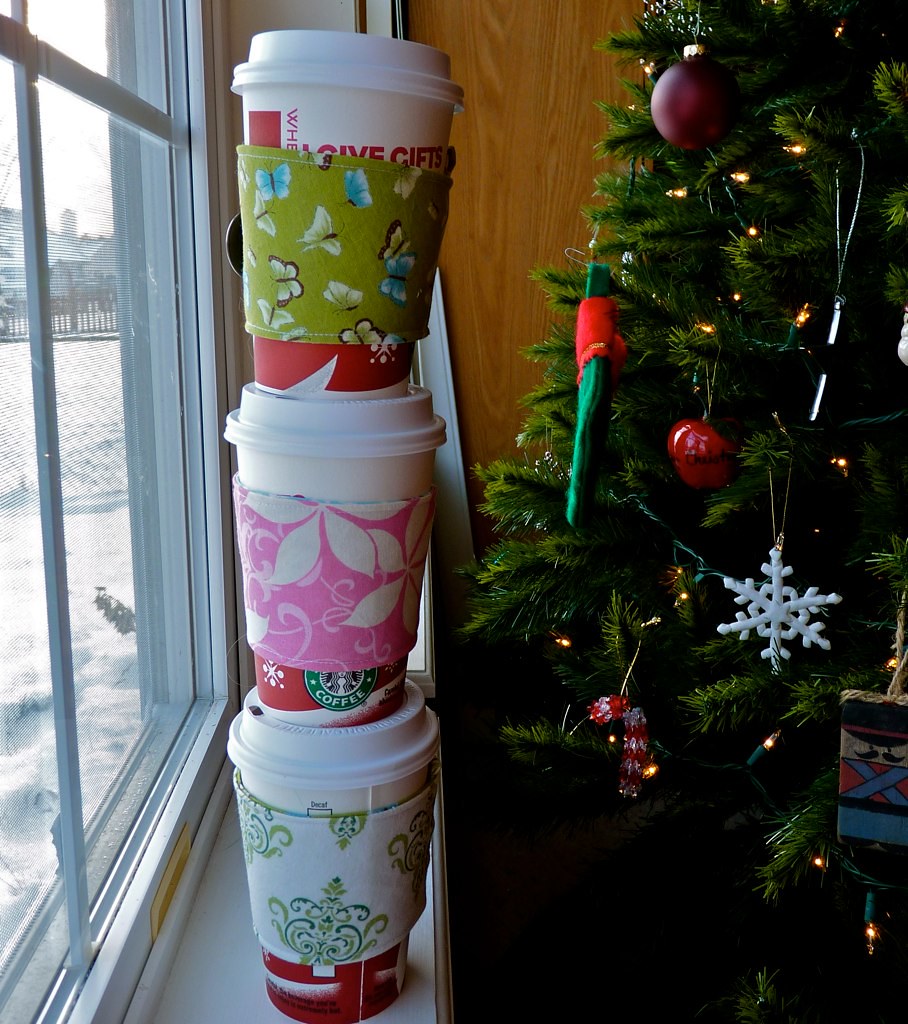
Along with the Beaded Christmas Tree Keychain that my kids made for their teachers, we are also giving them a giftcard to Starbucks and a reusable coffee cup wrap.
For the wrap I followed this pattern, substituting a bit of thin quilt batting for the fusible interfacing and an unused hairband for the elastic.
I love how simple this project is, and its a great way to use up scraps!
My kids and I worked on a project for their teachers' Christmas presents today and I thought I'd share a quick tutorial with you. This little keychain is quick and easy to make and requires only a few materials.
Materials: (for each keychain)
1 Keychain ring
1.5 yards flat plastic lacing or satin cord
1 star bead
2 brown pony beads
44 green pony beads
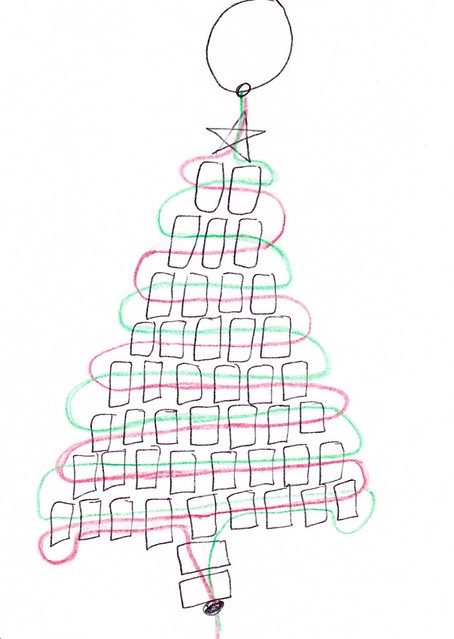
Start by folding the cord/lacing in half and attach it to your keychain using a lark's head knot (see this link for more info: http://www.ehow.com/how_13480_make-larks-head.html). I drew a quick diagram of how to string the beads but following that I will write out an explanation to the best of my ability! I didn't take pictures of the progress, but hopefully it will make sense. The two colors (red and green) represent the two free ends of the cord/lacing once its been attached to the keychain ring.
Row 1: String both free ends through the star bead.
Row 2: String 2 green beads on one of the free ends (represented by the green line in the above diagram). Then insert the other free end (represented by the red line above) back through those two beads so that you have the green line sticking out of one side and the red line out of the other. Pull both free ends until the beads are tight against the star bead, being cautious not to pull too tight.
Row 3: String 3 green beads on one of the free ends and repeat as above.
Rows 4-8: Continue in this pattern, adding one extra bead per row.
Row 9: String 9 green beads on one of the free ends and repeat as above. When the beads have been pulled tight, take one of the free ends and, skipping the first bead, insert into the second third and 4th beads and pull out between 4th and 5th beads. Repeat on the other end. Pull the ends to tighten up the Christmas tree. String both free ends through two brown beads, pull tight, and tie several knots, making sure the knot is large enough to prevent the beads from slipping off.
I learned a little trick from knitting that actually paid off for our project. If you are using the plastic lacing you can help the project lay flat if it is getting bunched up by holding it in the steam from a boiling teapot. When the plastic is hot it will relax and you can pull and stretch it and lay it flat and when it cools it will stay much nicer. If it doesn't work the first time, try it again!
The Christmas tree is not the only project we've done, we also made penguins yesterday using this pattern with the addition of a row of blue "ice" below his feet. The projects are limitless. Using your imagination you could probably design something for any occasion. My 5 yr old had a bit of trouble doing this completely on her own, but my 6 1/2 yr old got the hang of it very quickly :)
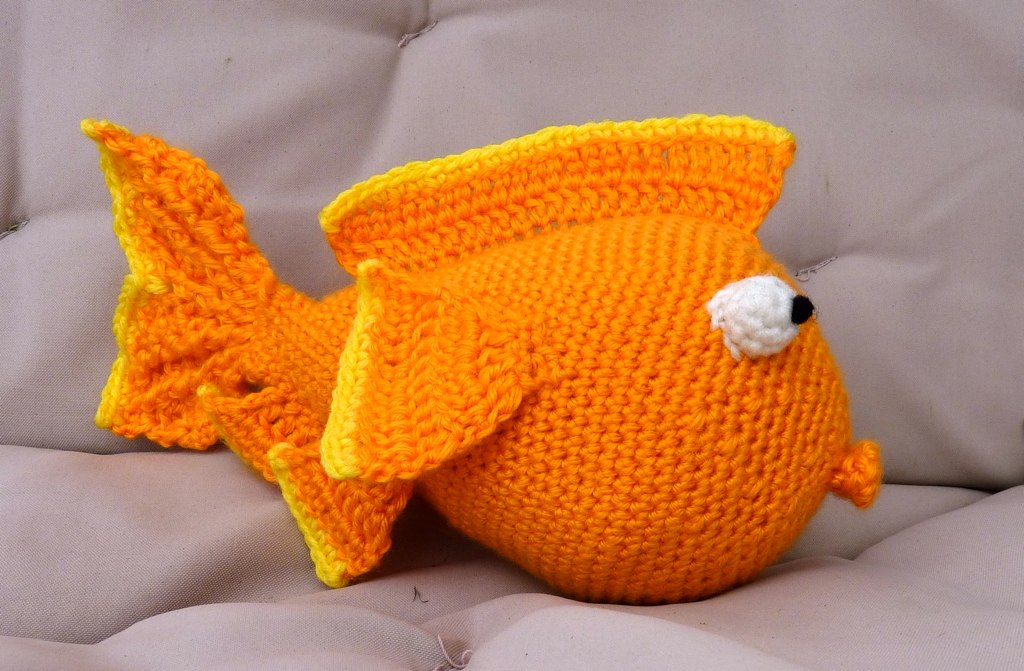
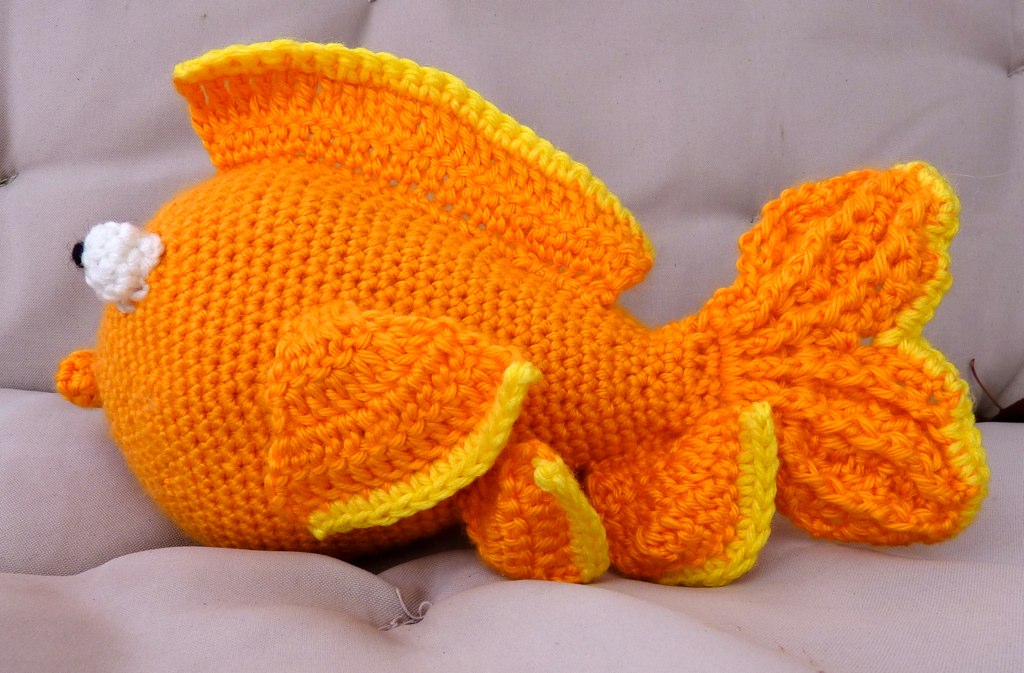
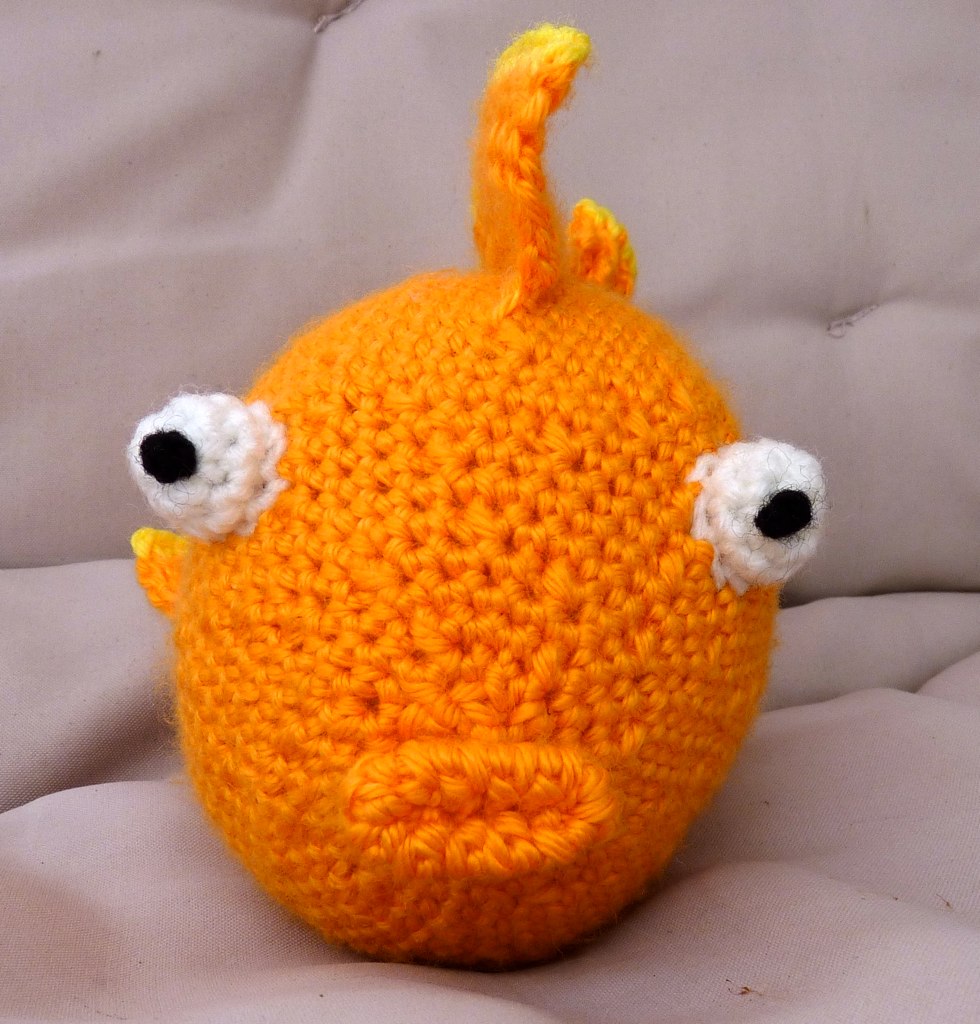
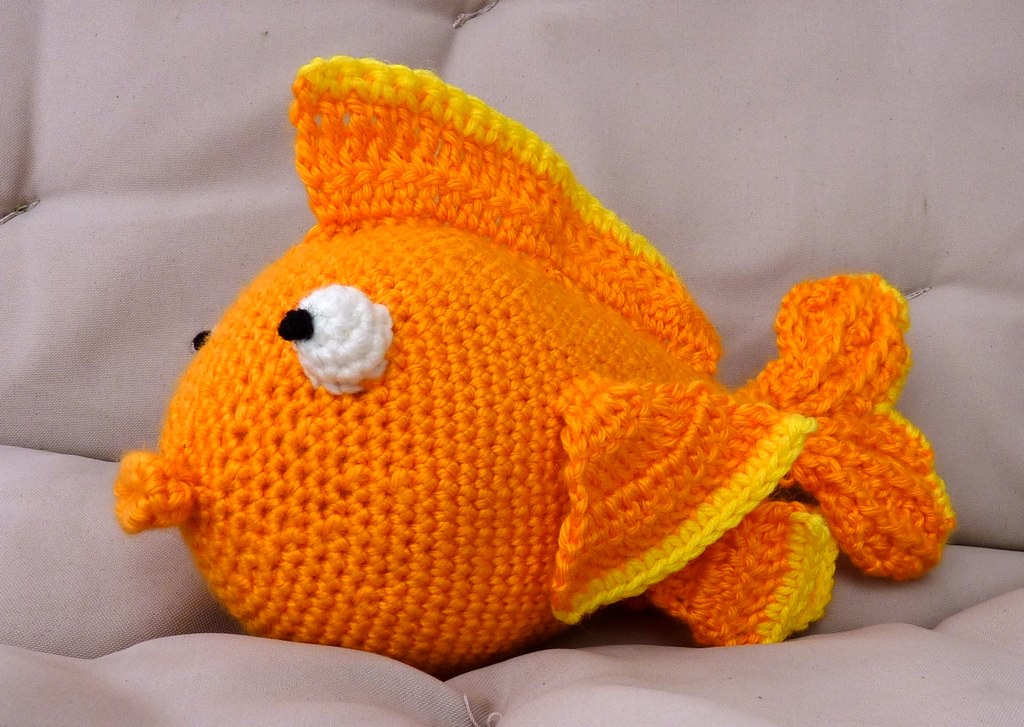
My son's best friend has a goldfish, Goldie. He is very fond of this fish, and to honor the beloved pet his mom asked me to make a goldfish stuffie for her son for Christmas.
I couldn't find a pattern out there for a goldfish so I had to improvise. I had so much fun putting together this little guy - from the fishy shaped body, to the ribbed tail and multiple fins, to the bulging fishy eyes!
I'm really happy with how he turned out! and the addition of the smooching fish lips as suggested by the client really pulled it all together. I'm sure this will be a much better playmate than the real thing :)
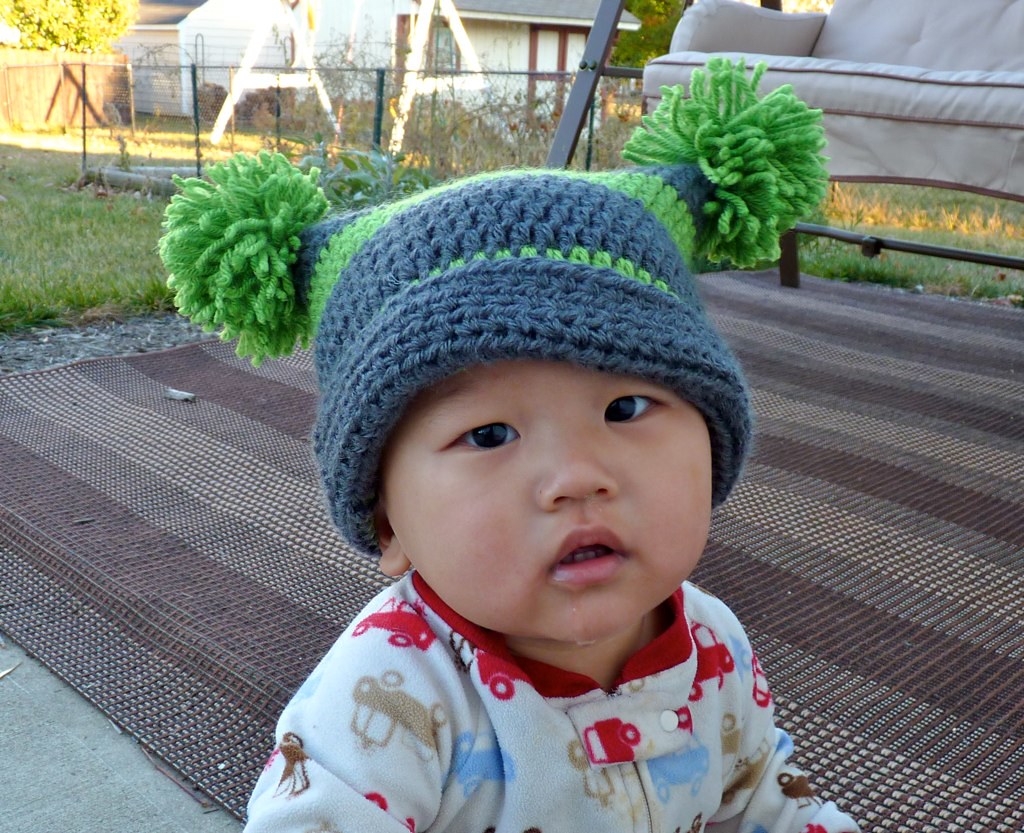
In fall everyone's looking for a good hat to keep their little ones' ears toasty. I've had a variety of different orders lately with lots of fun colors! I'm pretty lucky to have several in-home hat models to test out my sizing on, and to just enjoy the cuteness of these little toppers :)
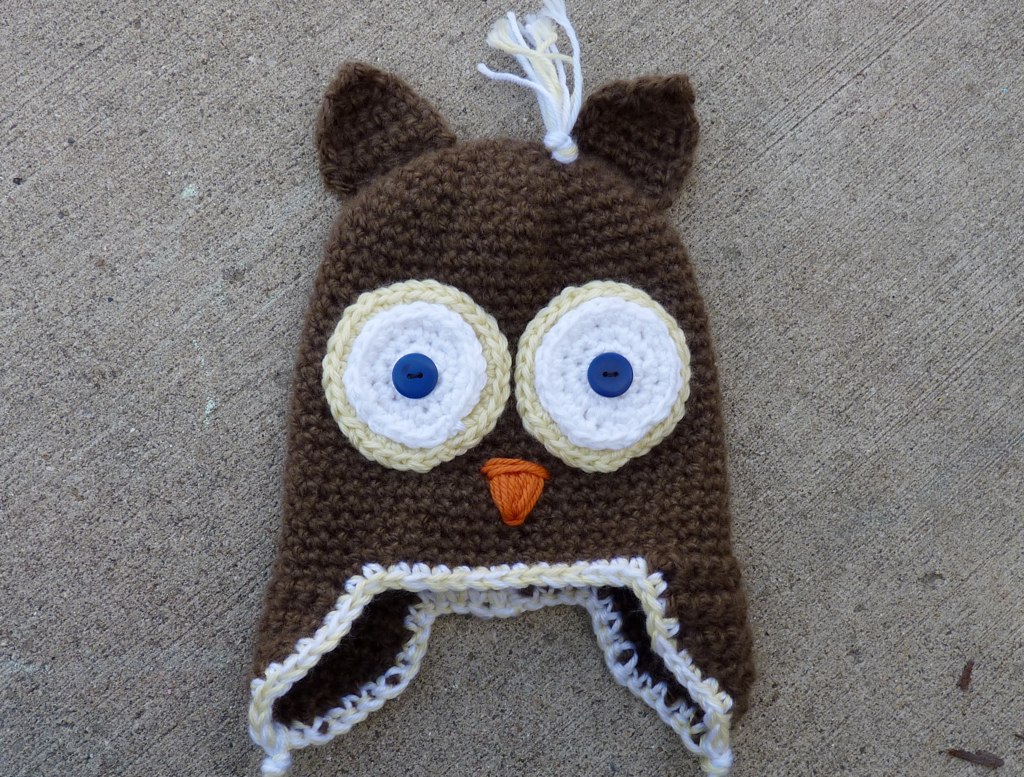
I recently had a request for an owl hat to be used as part of a little boy's Halloween costume. I thought the idea was brilliant, and couldn't believe I hadn't done something similar for one of my own children in the past! Looking on Etsy I found a super cute pattern that allowed the user to sell items made from the pattern (not always true!). While the pattern wasn't as thorough as I am used to I was able to complete the hat and make it look just like the example. I was thrilled with how it came out! It was made with a bulky yarn and is super soft and should be VERY warm, which is good since it was so cold at Halloween this year :)
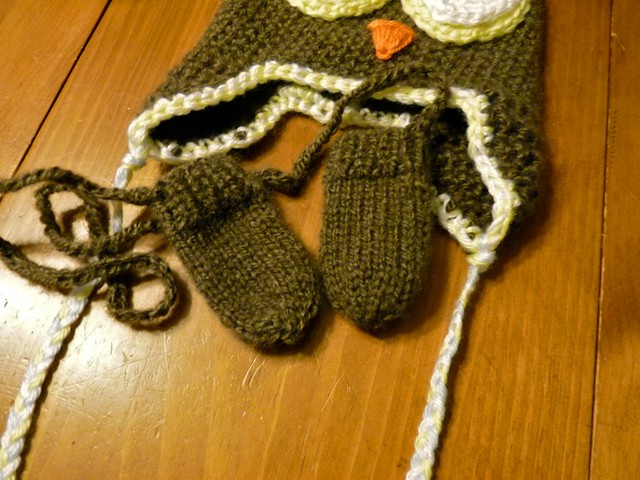
The customer also requested some mittens made from matching yarn. We chose to go with a thumbless mitt because of the age of the baby, and it had a connecting cord to keep those little mitts from getting lost when baby inevitably pulls them off!
Its that season. The time of year where a warm sweater and hat are necessary in the morning, but by afternoon you wish you were in shorts! I pulled out all of my kids winter wear this past weekend and thoroughly enjoyed watching them wear things I've made for them. I realized this week that my oldest son has nowhere near enough handknits. I guess I can add that to my Christmas list!
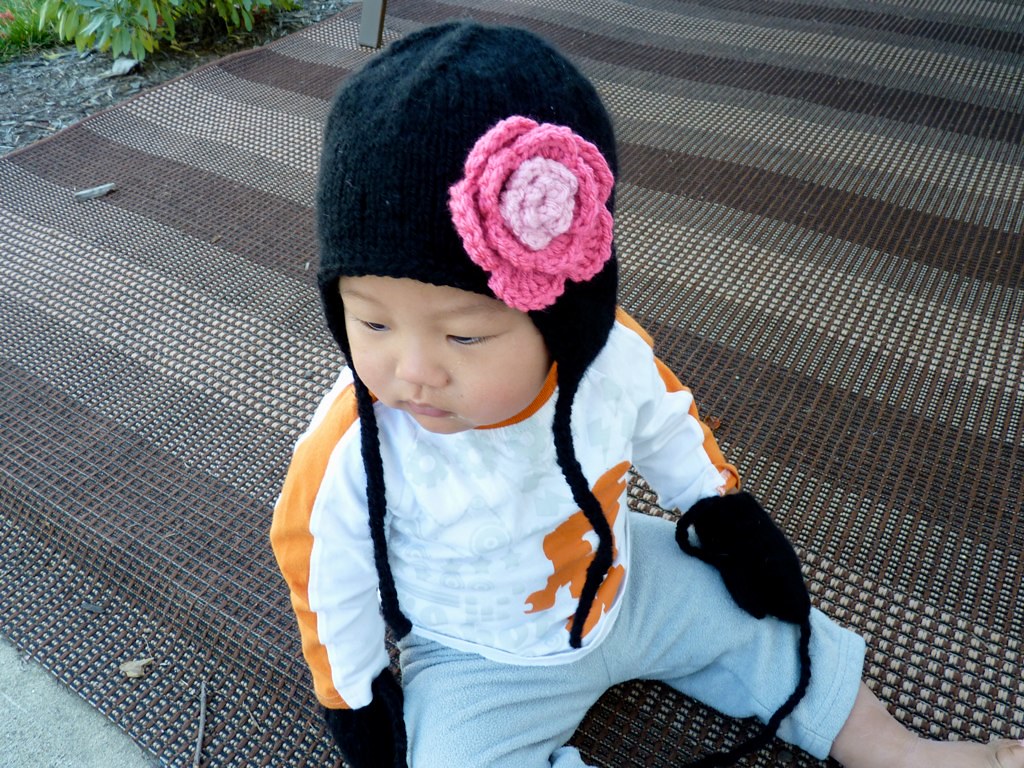
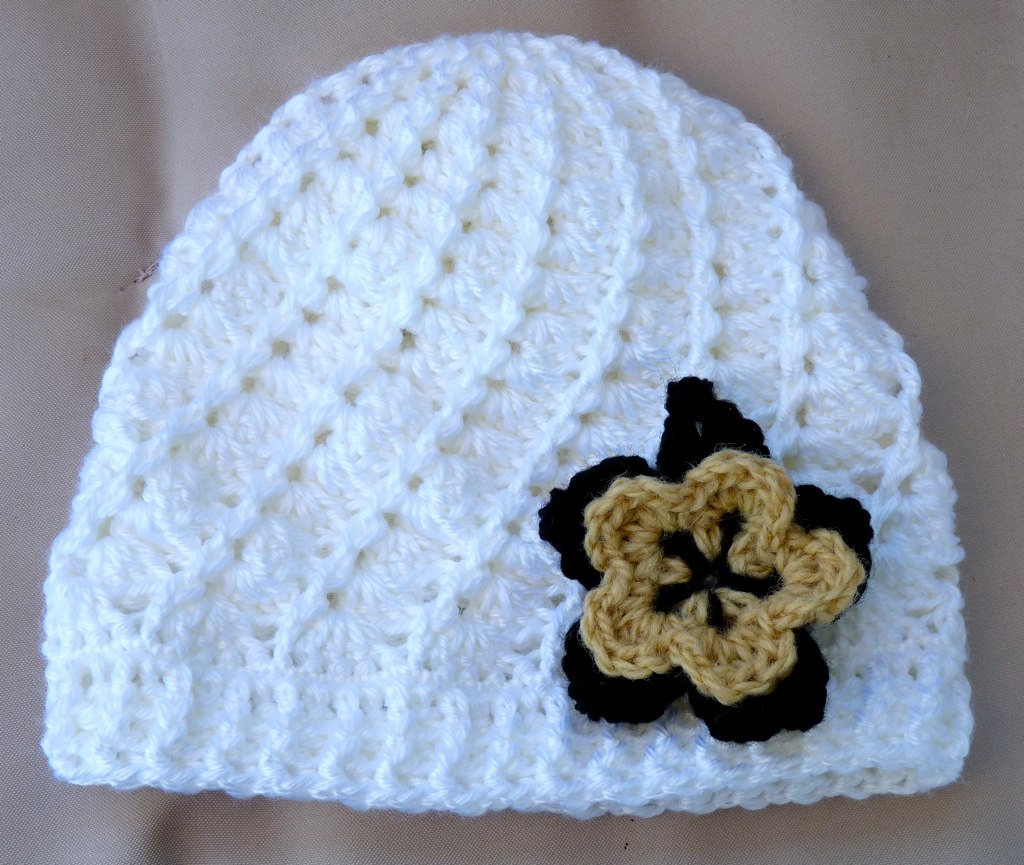
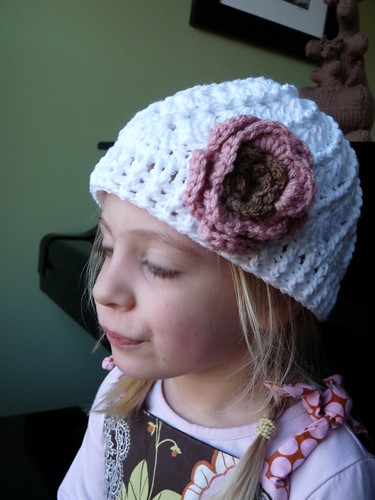
If you missed it, last week I did a brief giveaway on the Knits and Knots Facebook page. Here's the first of the winning hats. Its the ever popular Divine Hat with a special Saints black and gold flower. The winner lives in Louisiana and requested a hat her daughter could wear to celebrate her favorite team for football season :)
I'm doing a giveaway on the Knits and Knots facebook page. If you're a facebook user, check out the page and enter to win a white Divine Hat in any size and one flower of your color choice!
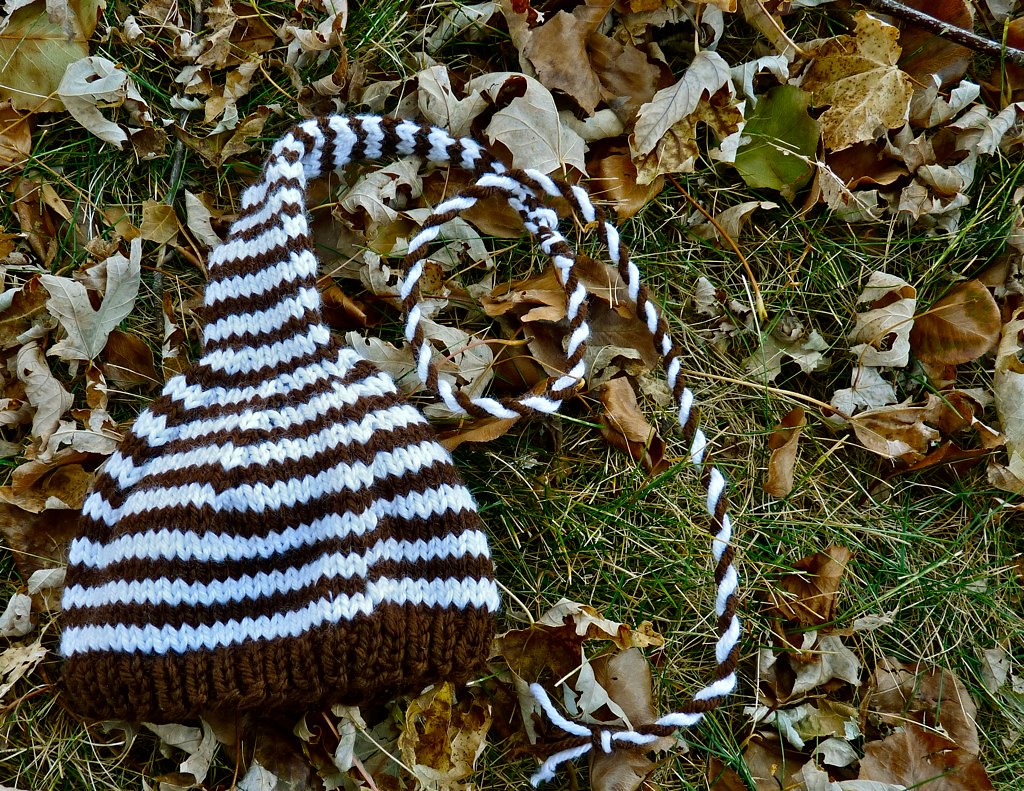
In preparation for my 12 hr flight to Korea to I had to consider what project I was going to bring along, because I crafter can't be without a craft for a whole week! I wanted something small enough to complete on the trip but interesting enough that I would actually want to work on it. I figured it would be fun to use that time to make something for Alex.
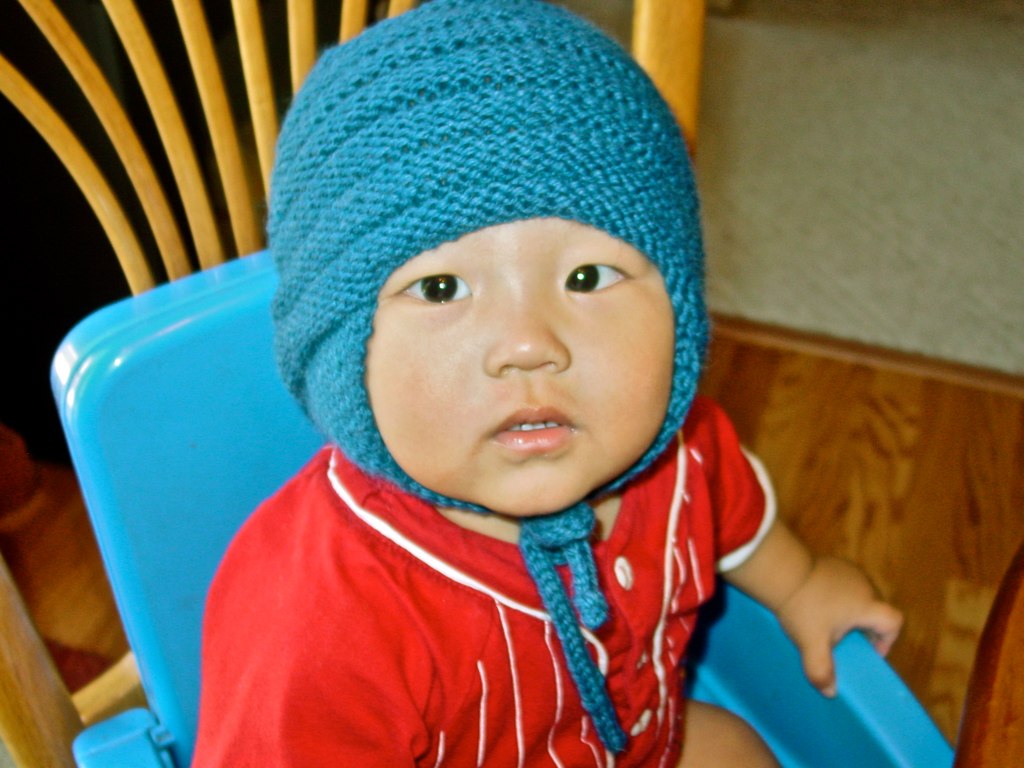
I did my research on Ravelry.com and decided on the Buzzbee hat pattern, which is part of a set of hats for babies called "Wee Wooly Toppers" by Wooly Wormhead. I loved the simplicity of the pattern and the interesting construction. It just plain looked unique :) I had my older two kids help we pick out yarn at our (new!) LYS, Nomad Yarns. We went with a super soft wool, Ella Rae - Amity, in a beautiful shade of blue (colorway 24)
Now, unfortunately I did not work on the hat AT ALL the entire trip! I was to excited/nervous/anxious to do anything but watch movies on the plane. There was no way my brain could concentrate on anything else! But as soon as I was home and over the jet lag I dove right in. The hat worked up in no time flat, and even with a new baby in the house I was able to finish it in about 3 days (3 nap times, that is). The pattern was very well written, but it is kinda bare bones. She expects that you'll be able to look up some techniques on the internet or in books - this is to cut down on the pattern cost. Less tutorials by her means cost saving for you. Specifically, this pattern required a cable cast on. I had not done that one yet and had to look it up online, but found a great tutorial and didn't have any issue making the pattern work.
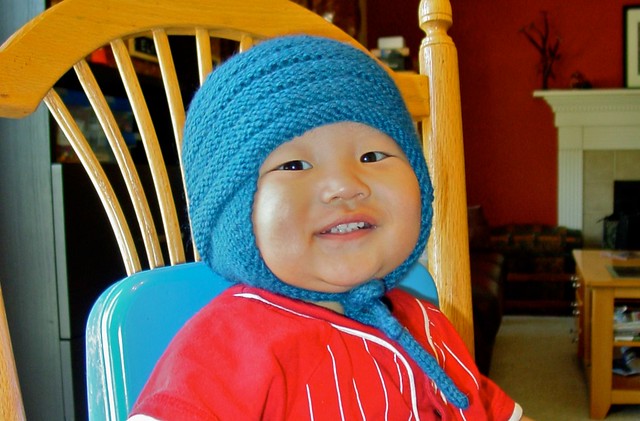
You can see the finished product is just so stinkin' cute! I think the model has a bit to do with the cuteness factor though :) While he absolutely hated having it put on, once it was tied and he was distracted he didn't seem to mind. And I bet you we'll all appreciate the extra layer of warmth come winter time!
Thanks for your patience while I was away! We have truly enjoyed the last few weeks preparing for our little one and traveling to pick him up. I think we've finally adjusted to our new routine and I believe I'm ready to start taking orders again. I am going to adjust the wait time on projects a bit until I'm certain I can get things done in a timely manner, but if you contact me for a price quote I will also give you an accurate time quote as well!
I'll be working on some special projects for his birthday that is just around the corner and plan to share some here :) We are planning a semi-traditional Dol celebration and that means I get to try out some things I'm not so familiar with - always fun! Here are just a few of the MANY photos I took on our trip - enjoy :)
Just a quick note to let you know that this Sunday I will be traveling to South Korea to bring home our newest son! Because this is our first adoption, I have no idea what the transition will be like and am therefore "on vacation" until further notice! I will post again when I'm ready to take orders again.
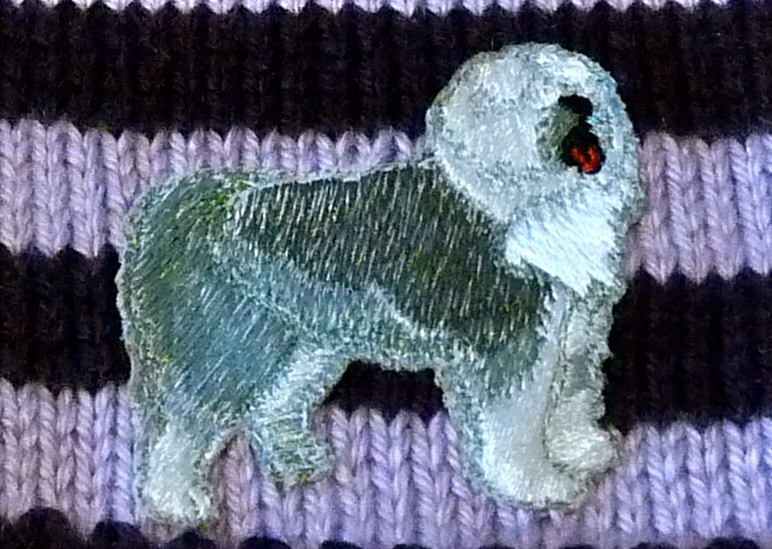
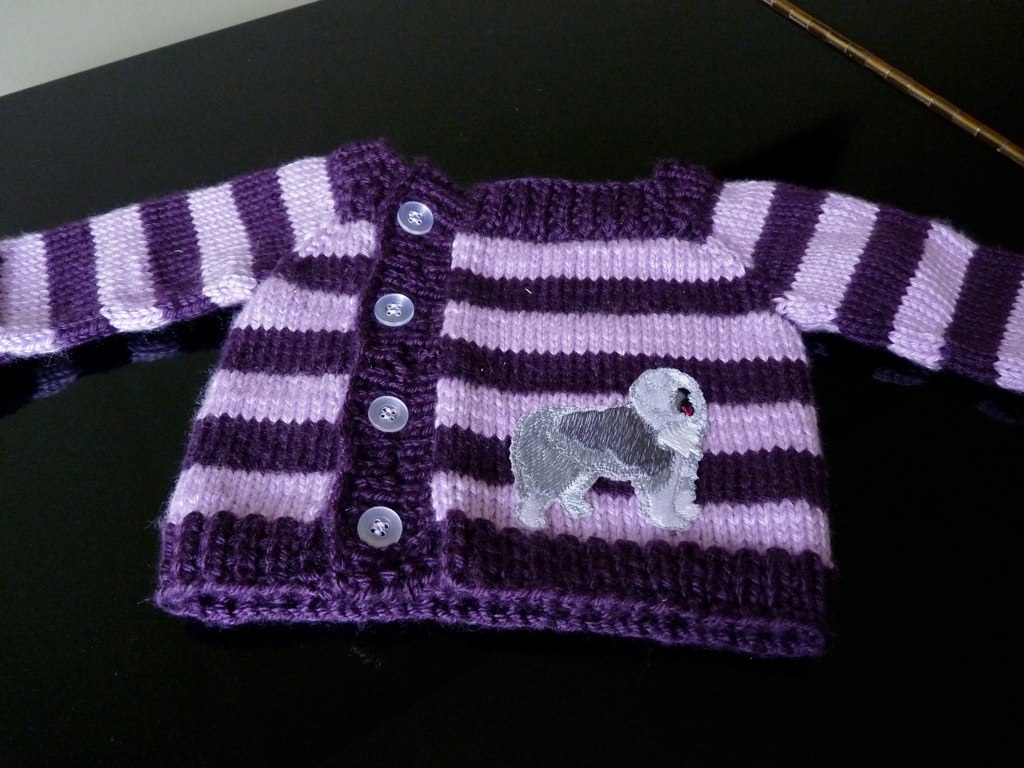
Baby rattle/sweater sets are becoming my new favorite order! I get the fun of both knitting and crochet and there's a lot of creativity that goes into trying to make a set that matches really well. I was contacted a few months ago to see if I could come up with a set that involved Old English Sheepdogs (OES). Of course I was thrilled to do it and figured it would be simple to find just what I needed. I was WRONG! It took me quite a while to find a place where I could order an OES applique for the sweater. I really wanted to do a felt applique like I have used on most of the sweaters I've made, but no one (I mean NO one) is making them! Luckily I came across MischyfPaws on Etsy. While MischyfPaws didn't have any appliques available for purchase, she sold lots and lots of doggy products, and was willing to work with me to produce an embroidered OES patch just the right size for my needs.
I think the sweater turned out so cute with the client-requested colors of purple/lavender an in the tiny size of 0-3 months. I opted for only 4 buttons on this one as trying to squeeze 7 in seemed like just too crowded.
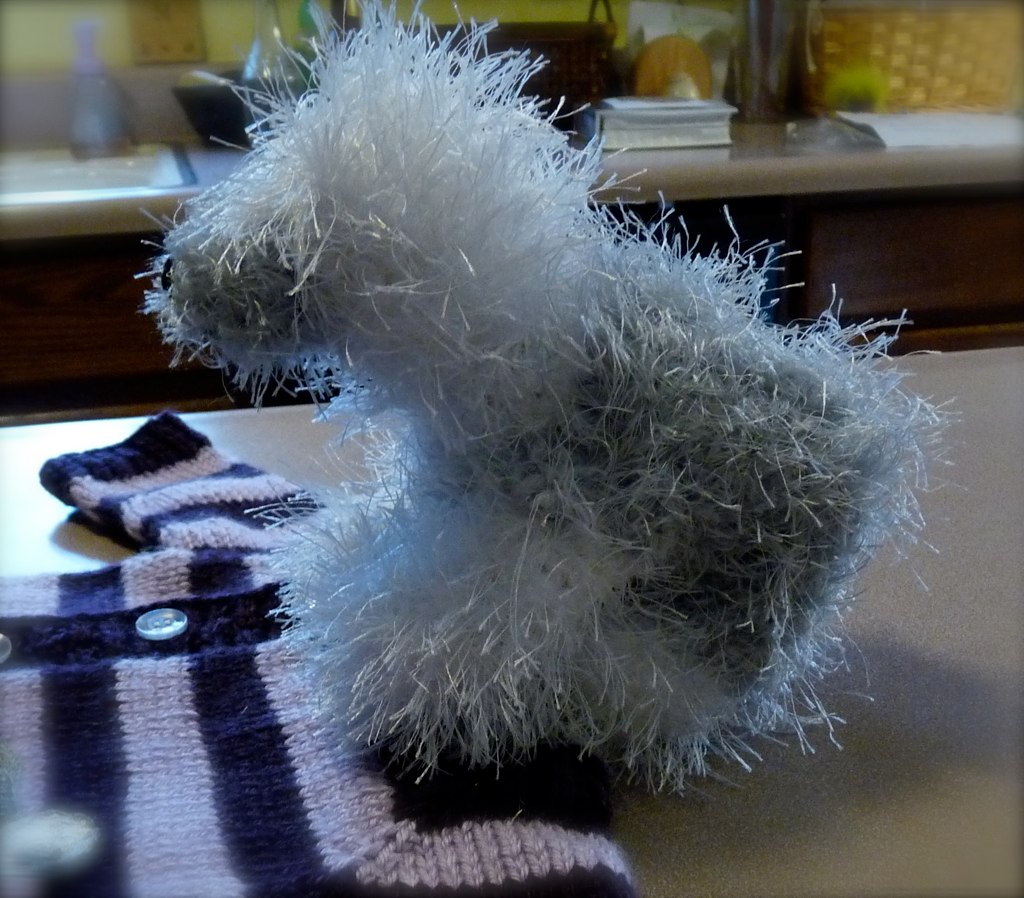
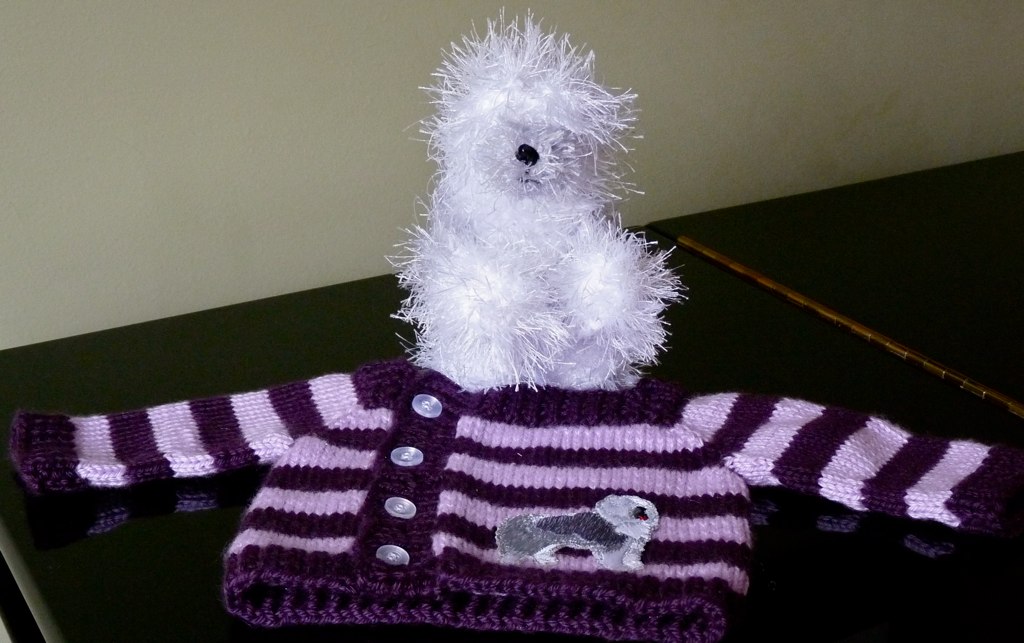
Making the rattle match was a bit challenging, but I decided to go with this fun fur yarn held double with a worsted weight in order to make the stuffie shaggy like a real Sheepdog.
Overall this set was a good challenge for me - it forced me to try new materials and I ended up with a product I am proud of!
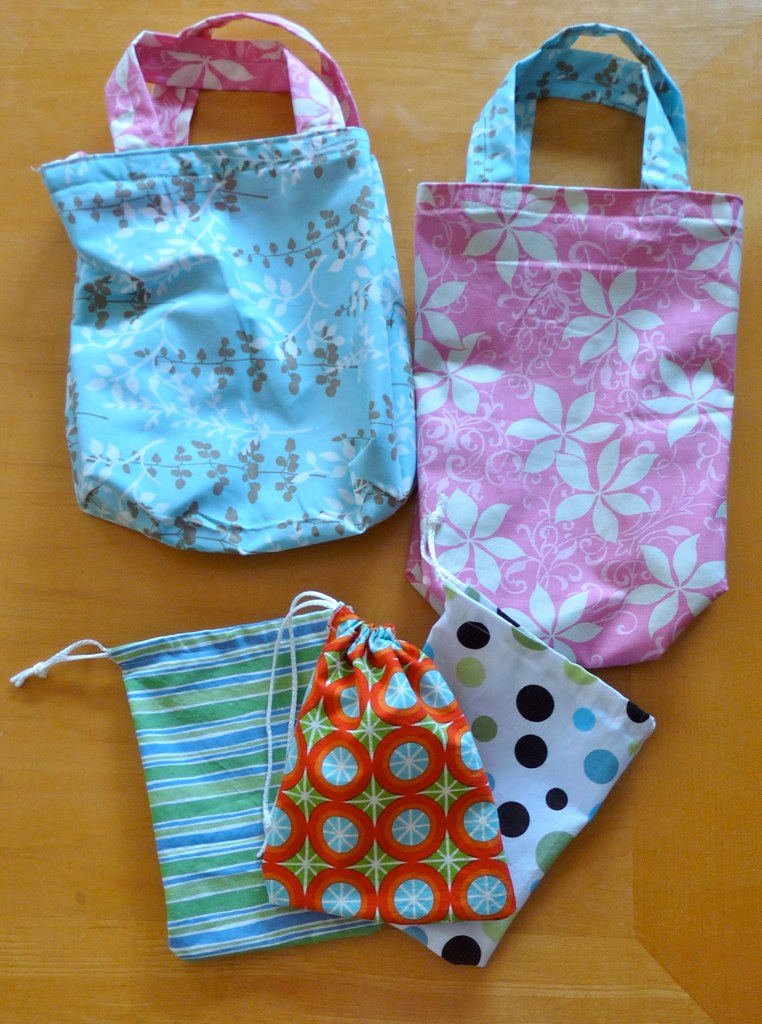
We have been encouraged to bring gifts to our son's foster family when we pick him up, and I knew I wanted to give them some things that I had made as a way of personally connecting with them. I love presenting gifts in fabric bags, they are re-usable and much more sturdy than the paper gift bags that are all the rage these days.
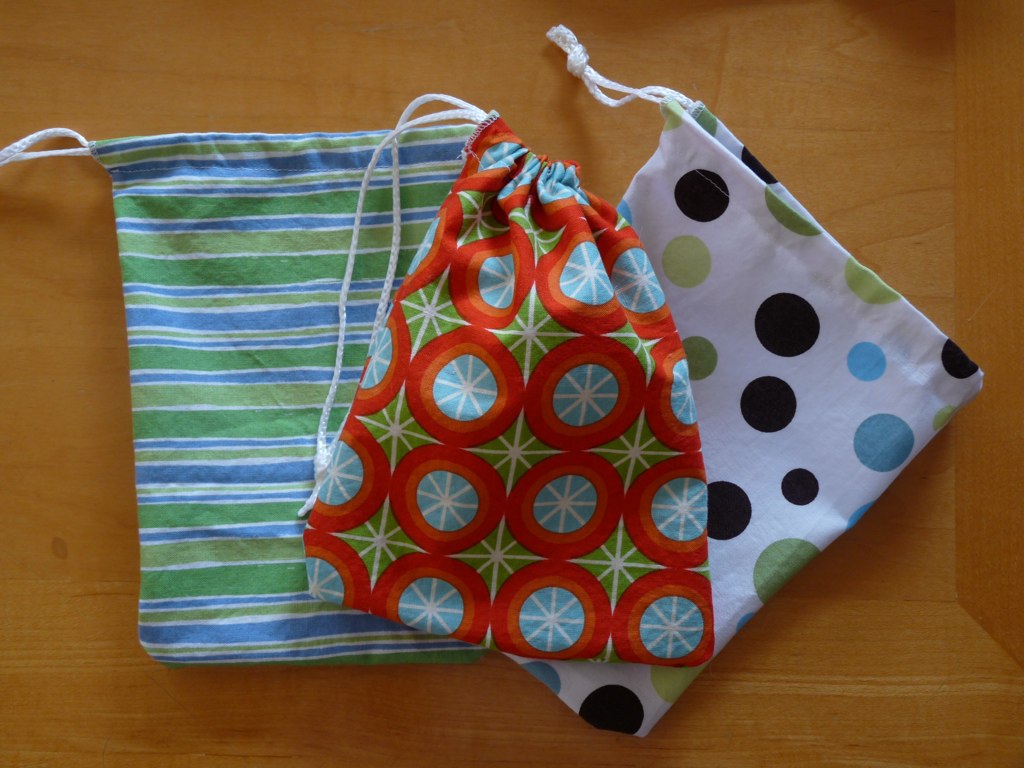
For the foster family's children I thought little drawstring bags filled with American candy might be a fun gift. There are 3 biological boys in the foster family, so I picked some fun boyish fabrics to fill with candy
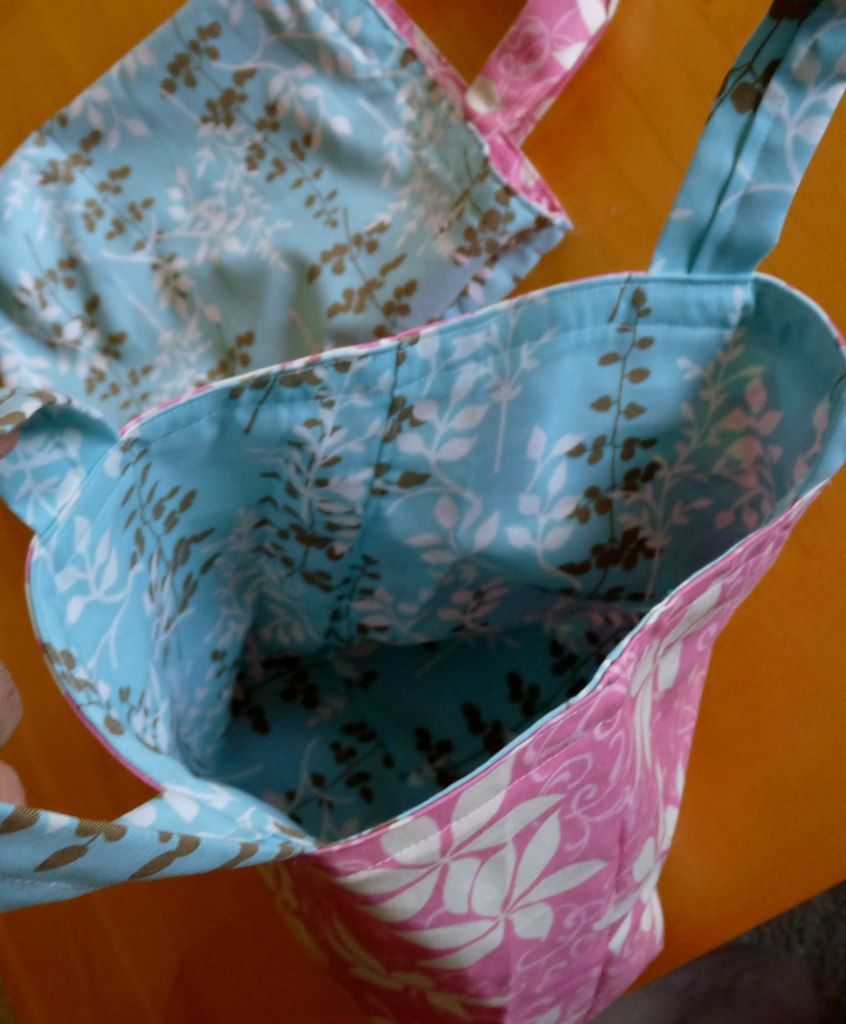
For the foster mother and the adoption specialist from the agency in Korea I made these reversible gift bags with pretty feminine fabrics. These are based on the Morse Bag pattern, with some minor adjustments to the height and width to make them a better gift bag size.
Since making these I've been compelled to wrap every gift I give in fabric! Its a fun, unique, and sustainable way to present a gift.
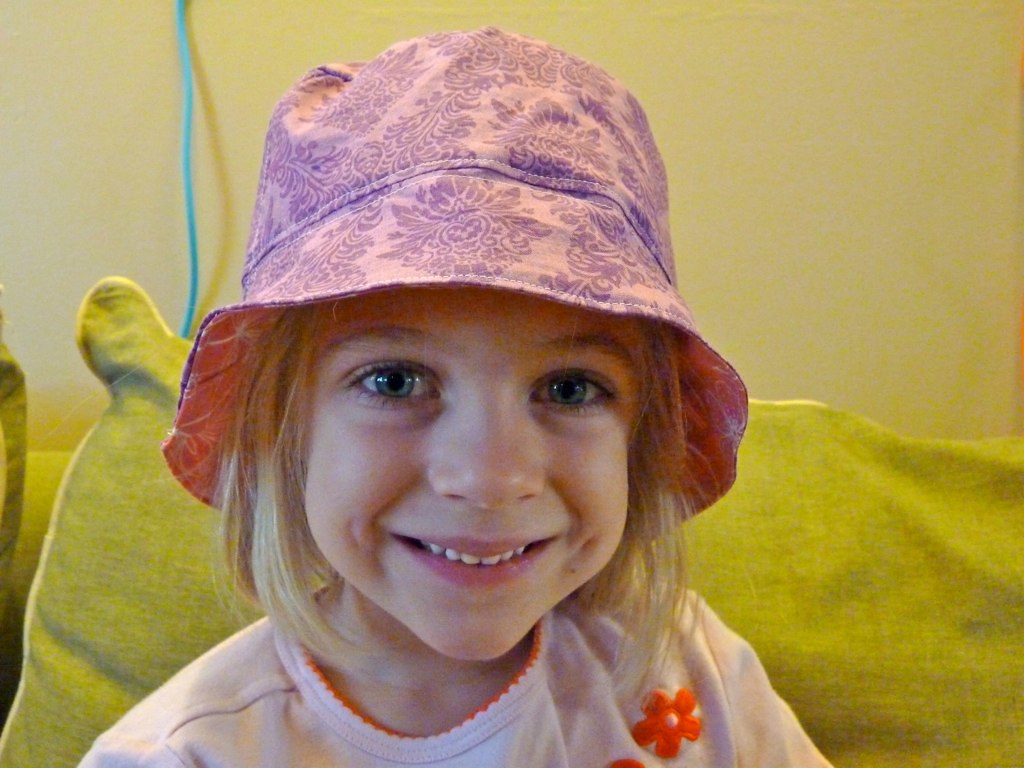
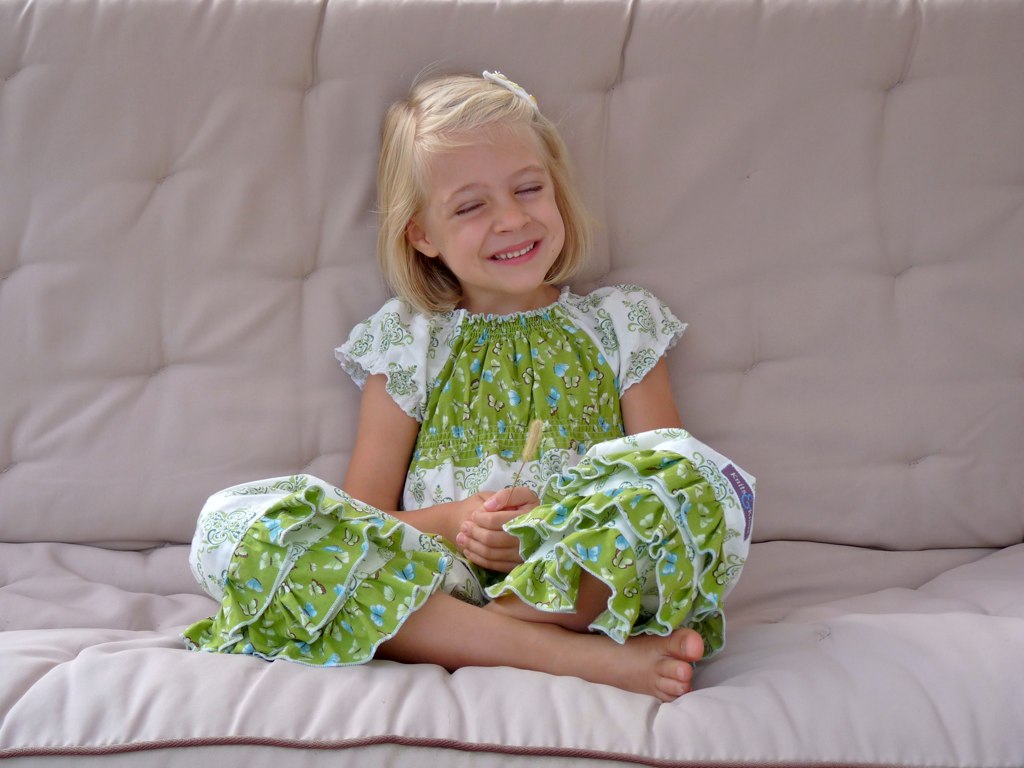
Today I turned this women's 2X shirt (found at a garage sale for $1!)
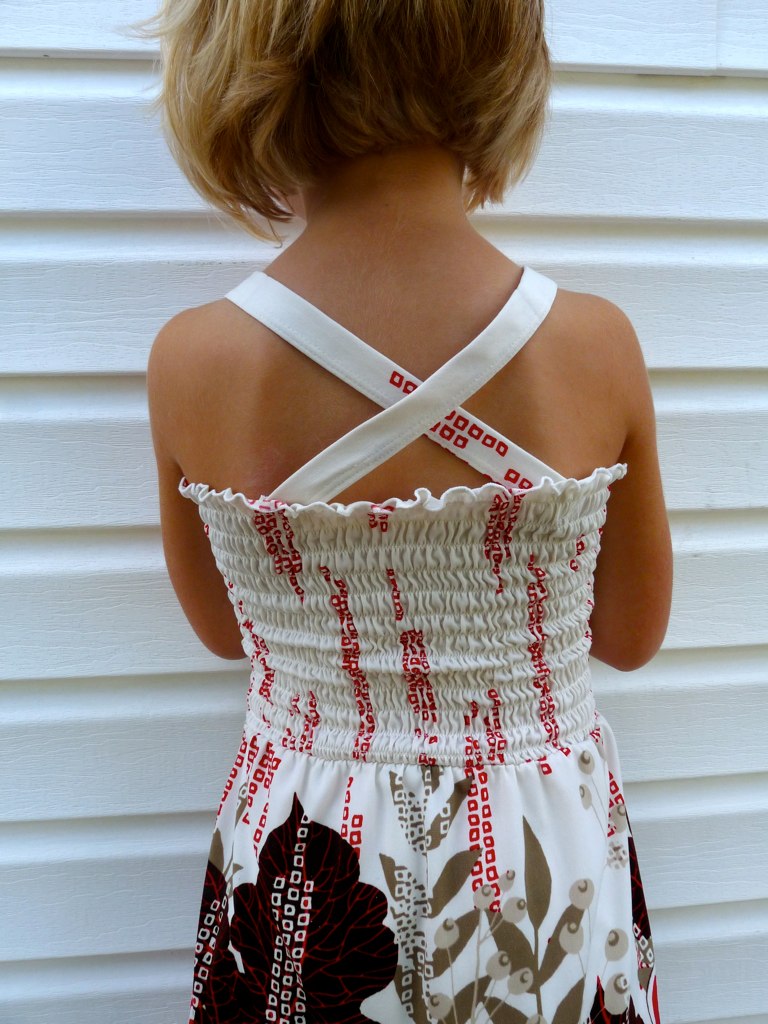
Into this girl's dress
Definitely had to sport the crossed straps. Much easier to keep on my squirmy 5 yr old's thin shoulders. Although you can't see it, they need a bit of tightening up. That's what I get for trying to measure the straps on her instead of using a measuring tape!
Oh she's so sweet :)
Ok, now I officially am a slacker mom to my son. I gotta figure out some boy crafts to do!
On my recent girls' weekend away I purchased my very first sewing patterns. All this time I've been creating from my mind or hand-drawing patterns, but when I ran across these Portabellopixie patterns at a quilt shop in Vincennes, IN I simply could not resist! I also was lucky enough to find some gorgeous fabric in their clearance room for $6/yard.
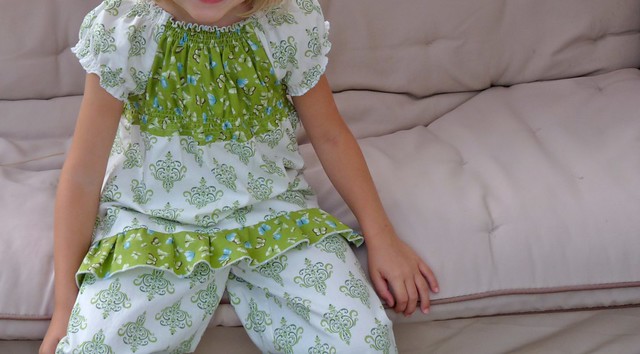
The patterns are well written and challenged me to learn two new techniques - rolled hemming on my serger, and shirring on my regular machine! I found this tutorial (via Crafty Christina, thanks Chris!) on shirring extremely helpful and honestly the only thing that would work on my machine. One thing I really loved about these pattern sets is that they are very much mix-and-match. I chose the peasant top and triple ruffle pants to showcase the pretty fabric.
My daughter was in love with the outfit from the moment I put it on her. Its soft, comfy, and cool, but its the first clothing I've made for her that I'm worried about keeping clean. White may not have been the best pants choice. Oh well, she won't fit in it for super long anyway - the girl is growing as fast as the weeds in my garden this summer!
It actually fits even better after washing - all of the shirring tightened up in the dryer, so I guess even if it does get dirty, a good scrub and some Oxyclean and she'll be set to go. Anna starts Kindergarten in about a week *sniff!* and she's gonna look as sweet as she is in this little number :)
*do you see the little patch on her knee in the above pic? That's my own printable tag made with this. Love this stuff! It may be pricey, but you can print a ton of tags on one sheet and they really do hold up well. Just sharing in case anyone is interested!
One of my favorite things about summer is the abundance of beauty there is and how easy it is to capture a beautiful photo. This year my mom, sister, and family friend and I went on our second annual girls' camping and kayaking weekend. We stayed at a fish and wildlife area in south-western Indiana. Our campsite was perfect, with access to the reservoir right from the site. We had a blast kayaking and chatting. We also made some great memories in the sweltering heat, fears of being attacked by the rather large-sounding racoon in the middle of the night, and monsoon-like nighttime rainstorm that threatened to collapse our tent. Fortunately one of the girls was smart enough to bring a coffee maker so that we could function after such an eventful night! We also visited nearby Vincennes, IN and saw the historical sites there and did some shopping. It was all very interesting and provided a great retreat. As much as I love getting away with my family, it was awesome to get away without them too :) I didn't do any crafting on this little weekend away, but I got some of my very favorite photos I've ever taken! I hope you enjoy them too :)
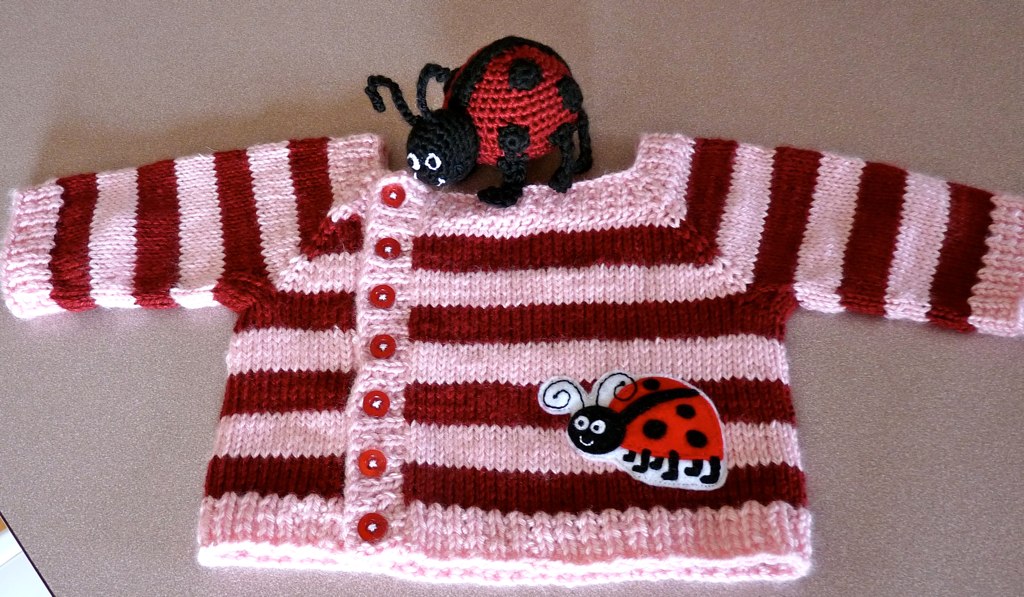
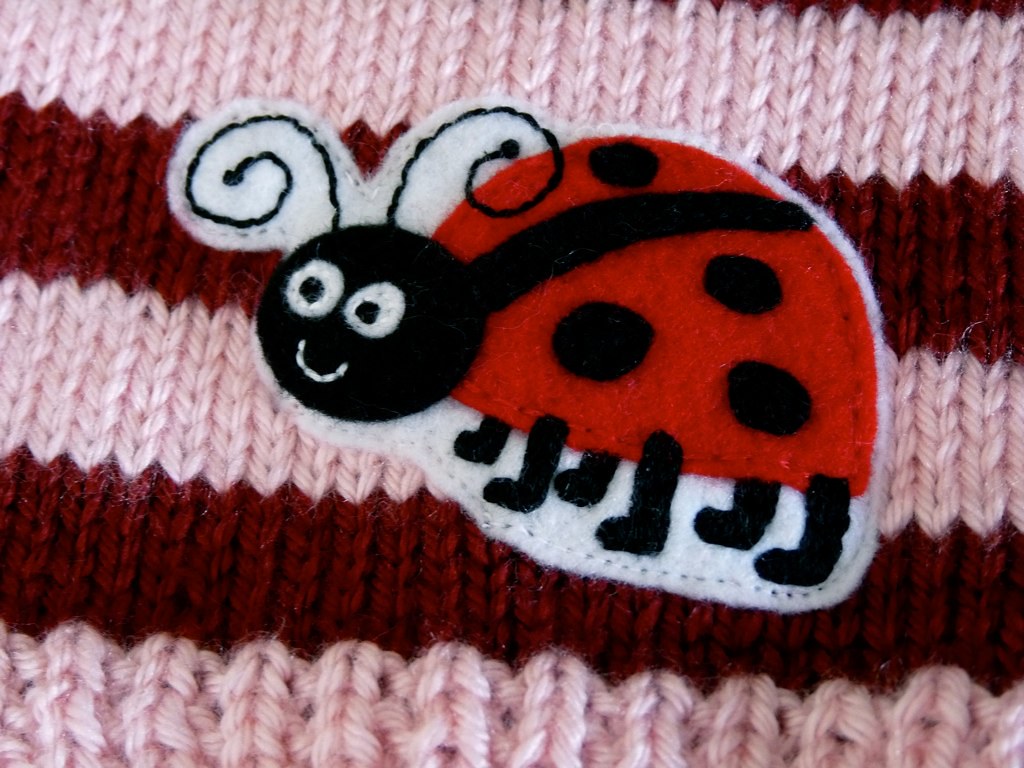
I got the chance to make one of my favorite patterns again, this time with a ladybug theme. The sweater and ladybug rattle are made in a soft washable yarn. I had Steph from TwoKazoos make the ladybug. She does such a great job and I always end up with just what I'm looking for. The little plush rattle was made to match the applique exactly, which I just get such a kick out of!
If you were thinking of buying handmade this Christmas its not to early to place an order. Since handmade items take time and care to produce, put your order in early to guarantee we can get it to you in time for the holidays! If you're interested in a sweater set or any other Knits and Knots item you can visit the Custom Order and Pricing pages for more info.
My family and I were fortunate enough to be invited to a friend's lake house this weekend, and we had the most wonderfully relaxing time! We spent all day on the lake exploring all different modes of water transportation and soaked up the sun and good conversation with friends. I also was able to score some good knitting time and worked up a little sweater for my most recent order. I will be attaching the little ladybug below it as soon as it arrives from Two Kazoos. Add a few buttons, whip up a matching rattle and the set will be complete! I love it when vacation makes my work that much more fun :)
I'll start off with a quick review of the product and my experience with CSN stores (to learn about how I was chosen to do a review you can go here) The delivery of my wok was as expected for an online order - I think it took about 5 days from the order going through to arrival at my door. The wok came unassembled, which was surprising to me, but was simple to put together. Basically I had to screw on the handle to both the wok and the lid. The set consists of the wok, lid, wooden cooking chopsticks, a wooden spatula, and a metal spatula. The wok is very sturdy, and looks to me as though it will last a long time. The lid is kind of thin, but seems to be strong enough - I haven't had a need to use it yet. The cooking utensils that came with the set are all great and I can see using them for many cooking applications. The chopsticks may be my new favorite cooking utensil actually! They are long and do a great job of moving food around when stir-frying. The only issue I had with the set at all is that although it is called "pre-seasoned" you can't just jump into using the wok. The set comes with a manual that takes you through the simple steps of removing a protective coating that has been placed on the wok. While it is easy, you can't just use it right out of the box. It is also not dishwasher safe, but is VERY easy to clean by hand, which I love! Overall, the set is great, and I can see it being my number one cooking pan for a long time because of its size and convenience.
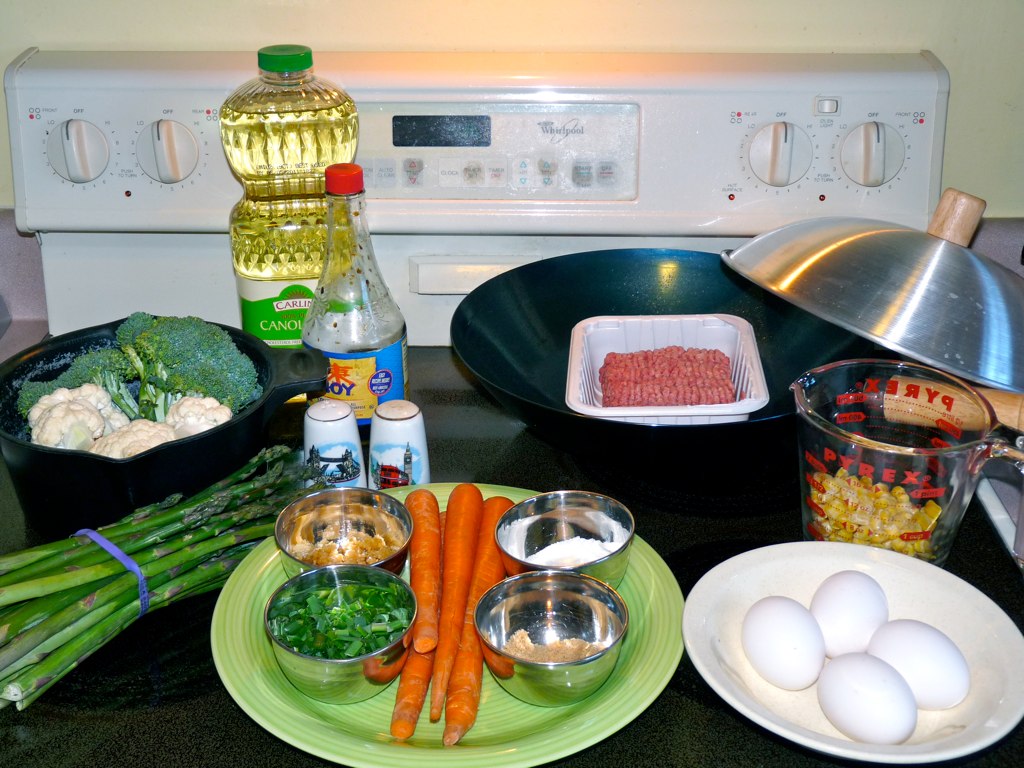
And now on to the Bi Bim Bap
Bi Bim Bap is a traditional Korean dish, which literally means "mixed rice" or "mixing rice" depending on who you ask. The basic idea is that you stir-fry different types of vegetables and a meat and put it over rice. Then add a little gochujang (hot pepper paste), mix it up, and you have a delicious meal! According to Wikpedia, traditionally, Bi Bim Bap would include julienned cucumber, zucchini, daikon, mushrooms, bellflower root, and gim (dried seaweed), as well as spinach, soybean sprouts, and bracken fern stems, tofu (either plain or sautéed), and/or a leaf of lettuce, plus a fried egg on top. The following recipe is an Americanized version of Bi Bim Bap based on the vegetables and items we typically have in our kitchen. The recipe I'm showing is loosely based on this recipe. Keep in mind, you can use pretty much any vegetables you have on hand in your kitchen. In the past i've used spinach, cabbage, green beans, sugar snap peas, pretty much whatever needs to be used up in the vegetable bin! Its a GREAT way to use up leftover veggies :) My kids don't do spicy, so we always skip the gochujang, but my husband is going to love our Korean Air flight when we go to get our son because they serve and awesome bi bim bap that comes with all the spicy gochujang you could want!
Ingredients:
1 lb lean ground beef, ground turkey, chicken breast or beef cut in strips
2 cups carrots, julienned* (see end for a little picture tutorial on this!)
2 cups broccoli, cut into bite-sized pieces
2 cups cauliflower, cut into bite-sized pieces
2 cups asparagus, tough ends removed and cut into bite-sized pieces
1 (15 1/4 ounce) can corn kernels, drained or 1.5 cups frozen corn kernals
4 eggs, scrabled
1/2 cup light soy sauce
2 tablespoons granulated sugar
1 tablespoon brown sugar
1/8 cup garlic, chopped
2 tbsp chives, chopped
oil, for frying (sesame is the traditional, but I usually use Canola)
salt and pepper
1.5-2 cups white rice (cook according to package directions)
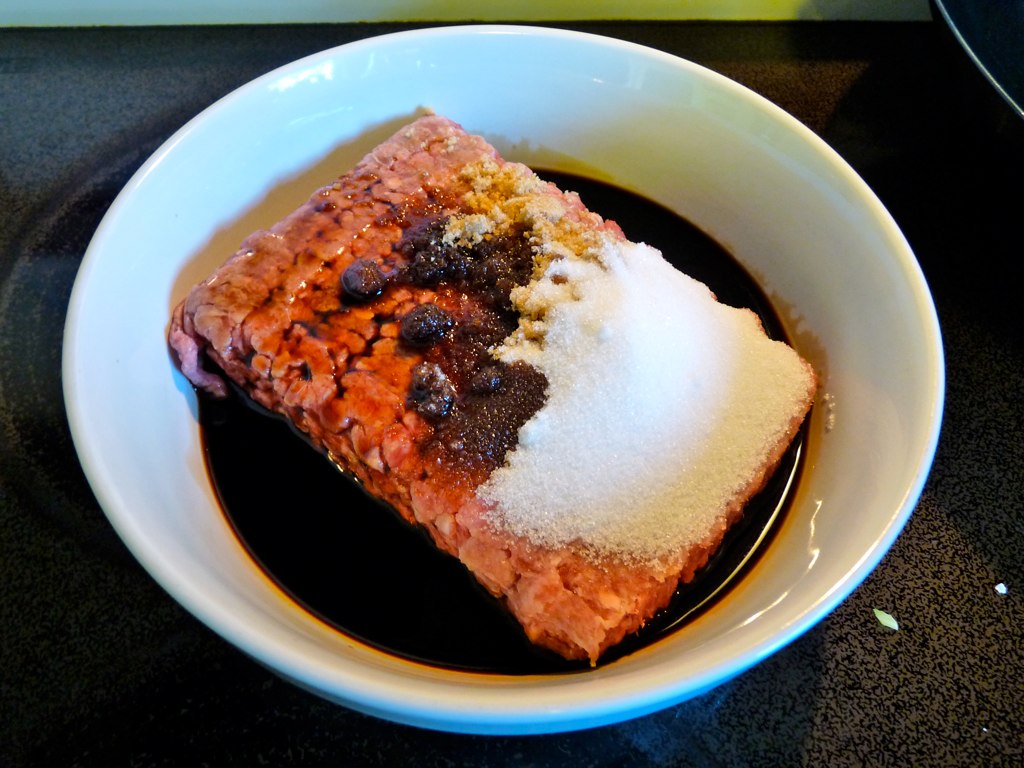
1) In a small bowl, combine meat, soy sauce, both sugars, and 1/2 of the garlic (my photo is missing the garlic, oops!). Mix together thoroughly to marinate.
2) Scramble the eggs and cook into small pancakes. Slice into strips. (see video below). Place into bowl and cover with foil to keep warm.
3) Heat small amount of oil in wok, add canned or frozen corn and a dash of salt. Cook until the corn starts to brown a little. Place into bowl and cover with foil to keep warm.
4) Heat small amount of oil in wok, add julienned carrots, add 1 tsp of sugar and stirfry until soft. Place into bowl and cover with foil to keep warm.
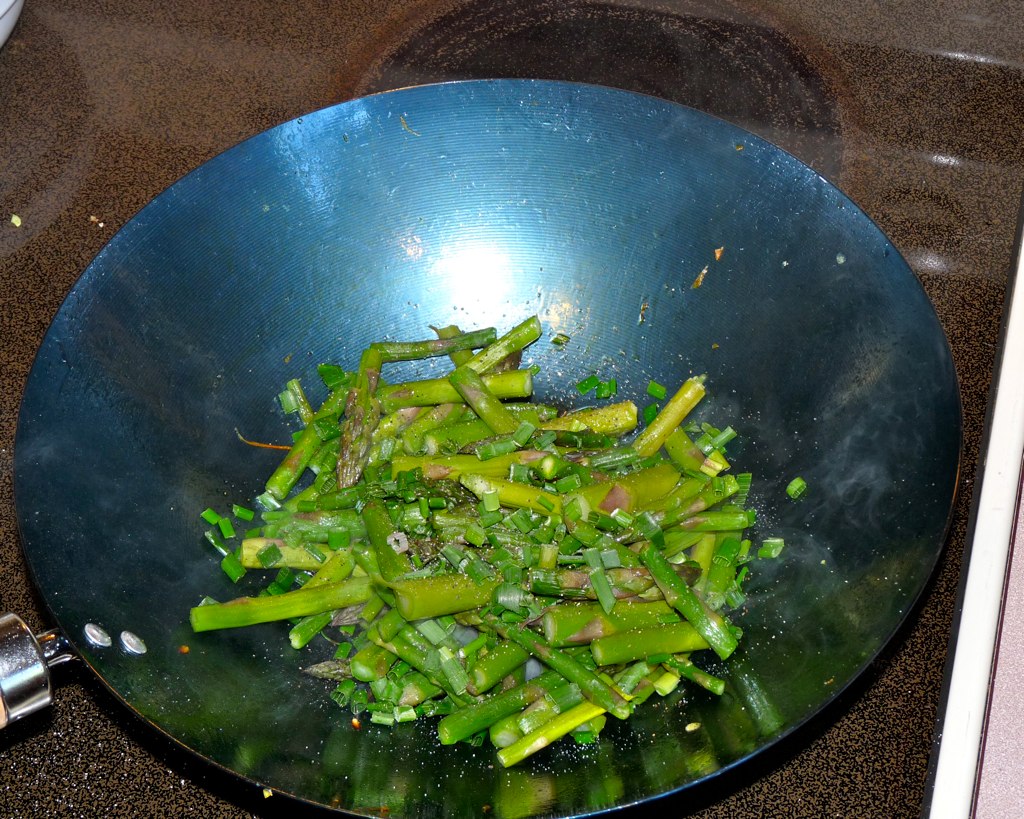
5) Heat small amount of oil in wok, add asparagus and chives, and season with salt and pepper. Stirfry until crisp-tender (and enjoy the AMAZING SMELL!) Place into bowl and cover with foil to keep warm.
6) Heat small amount of oil in wok, add broccoli, cauliflower and the rest of the garlic, and season with salt and pepper. Stirfry until crisp-tender. Place into bowl and cover with foil to keep warm.
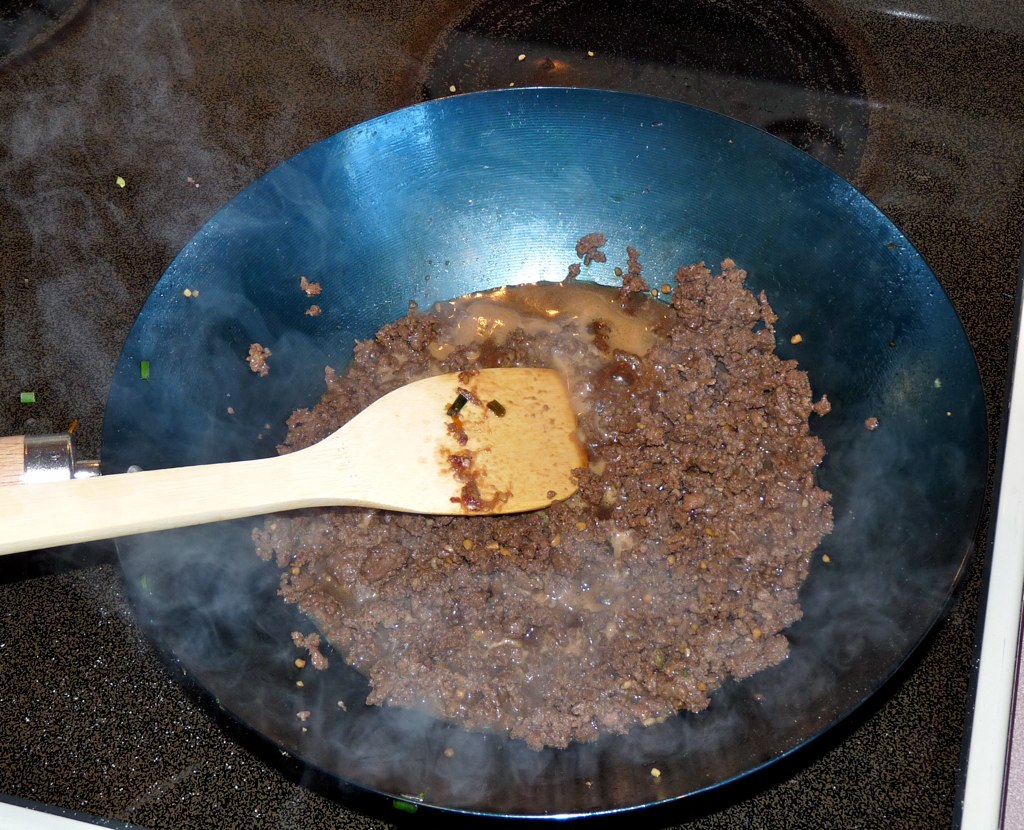
7) Add a small amount of oil to wok, add meat and marinade and heat until fully cooked. Place into bowl and cover with foil to keep warm.
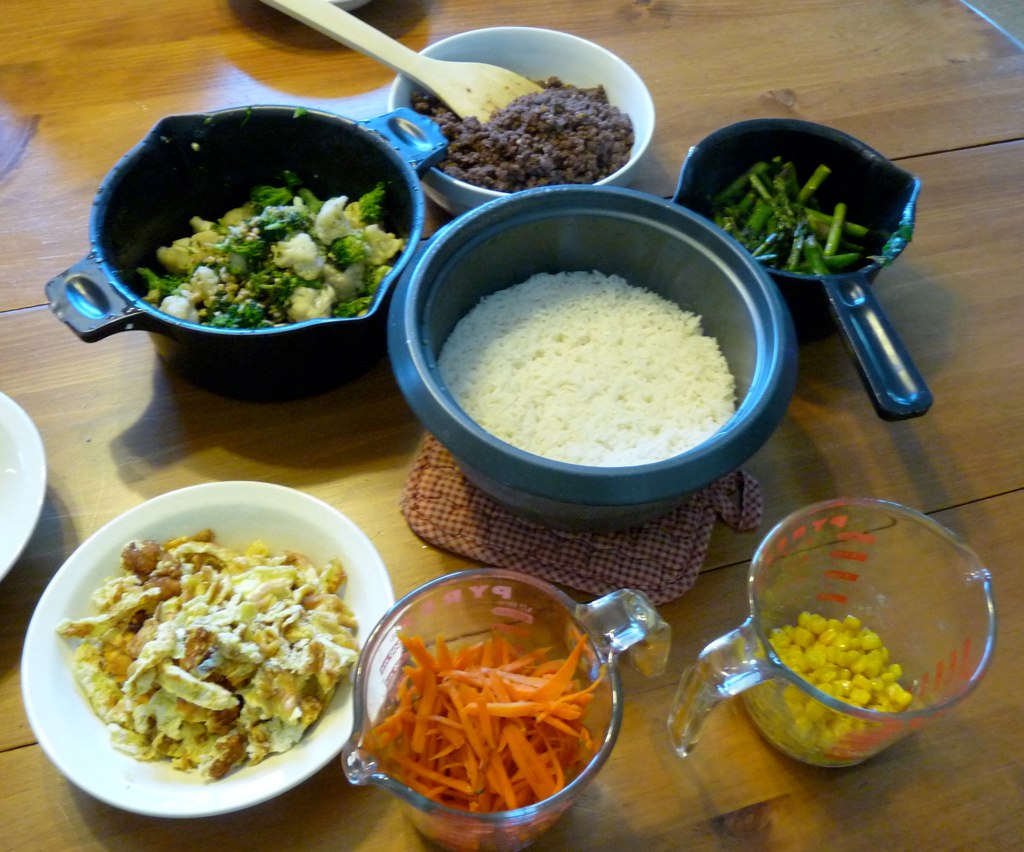
Either place all of the bowls out on the table, letting your family pick and choose what they want, or serve each person a bowl filled with rice and topped with a little each of the stir-fried dishes. Mix it up and enjoy the very yummiest stir-fry you've ever had!
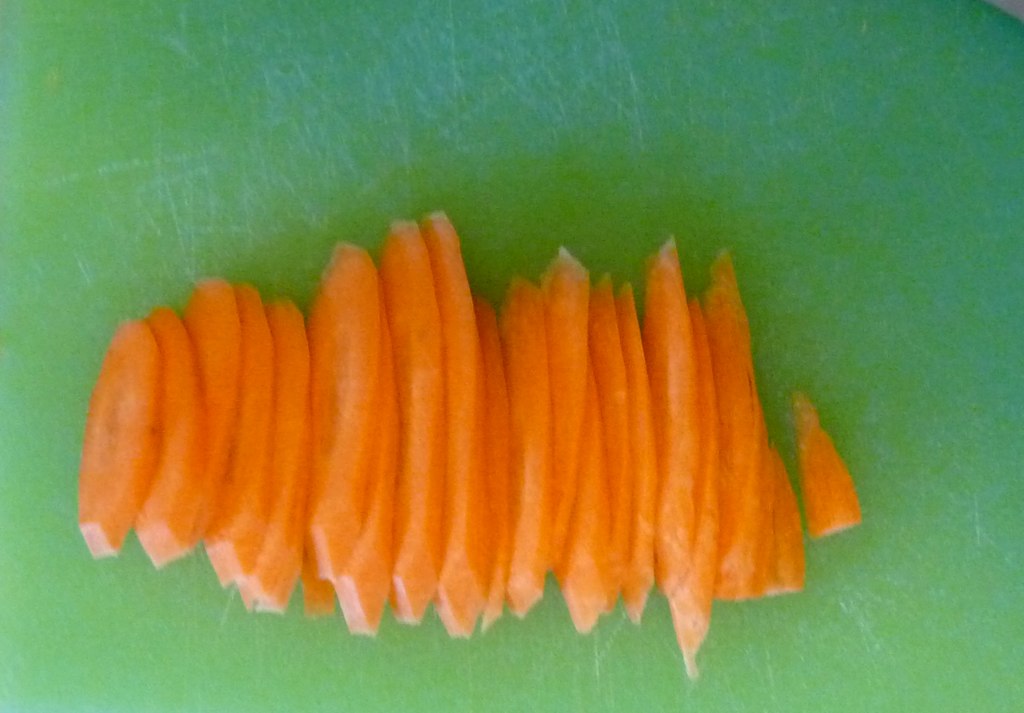
*how to quickly julienne carrots
1) cut a carrot at a steep angle creating thin, oval slices of carrot
2) push the slices into a neat row
3) cut down the row of slices to make little matchsticks (juliennes) of carrot.


