

Materials: (for each keychain)
1 Keychain ring
1.5 yards flat plastic lacing or satin cord
1 star bead
2 brown pony beads
44 green pony beads
Start by folding the cord/lacing in half and attach it to your keychain using a lark's head knot (see this link for more info: http://www.ehow.com/how_13480_make-larks-head.html). I drew a quick diagram of how to string the beads but following that I will write out an explanation to the best of my ability! I didn't take pictures of the progress, but hopefully it will make sense. The two colors (red and green) represent the two free ends of the cord/lacing once its been attached to the keychain ring.
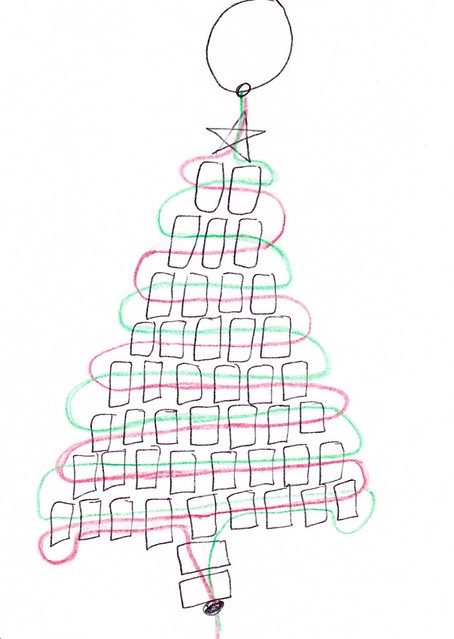
Row 1: String both free ends through the star bead.
Row 2: String 2 green beads on one of the free ends (represented by the green line in the above diagram). Then insert the other free end (represented by the red line above) back through those two beads so that you have the green line sticking out of one side and the red line out of the other. Pull both free ends until the beads are tight against the star bead, being cautious not to pull too tight.
Row 3: String 3 green beads on one of the free ends and repeat as above.
Rows 4-8: Continue in this pattern, adding one extra bead per row.
Row 9: String 9 green beads on one of the free ends and repeat as above. When the beads have been pulled tight, take one of the free ends and, skipping the first bead, insert into the second third and 4th beads and pull out between 4th and 5th beads. Repeat on the other end. Pull the ends to tighten up the Christmas tree. String both free ends through two brown beads, pull tight, and tie several knots, making sure the knot is large enough to prevent the beads from slipping off.
I learned a little trick from knitting that actually paid off for our project. If you are using the plastic lacing you can help the project lay flat if it is getting bunched up by holding it in the steam from a boiling teapot. When the plastic is hot it will relax and you can pull and stretch it and lay it flat and when it cools it will stay much nicer. If it doesn't work the first time, try it again!
The Christmas tree is not the only project we've done, we also made penguins yesterday using this pattern with the addition of a row of blue "ice" below his feet. The projects are limitless. Using your imagination you could probably design something for any occasion. My 5 yr old had a bit of trouble doing this completely on her own, but my 6 1/2 yr old got the hang of it very quickly :)
It's a great project! I love these kid friendly crafts, especially during the holidays!
ReplyDeleteWhat a great idea. Easy to make and handmade is always a treasured present. I'm sure the teacher would love it.
ReplyDeleteGreat tutorial! thanks for sharing.
ReplyDelete